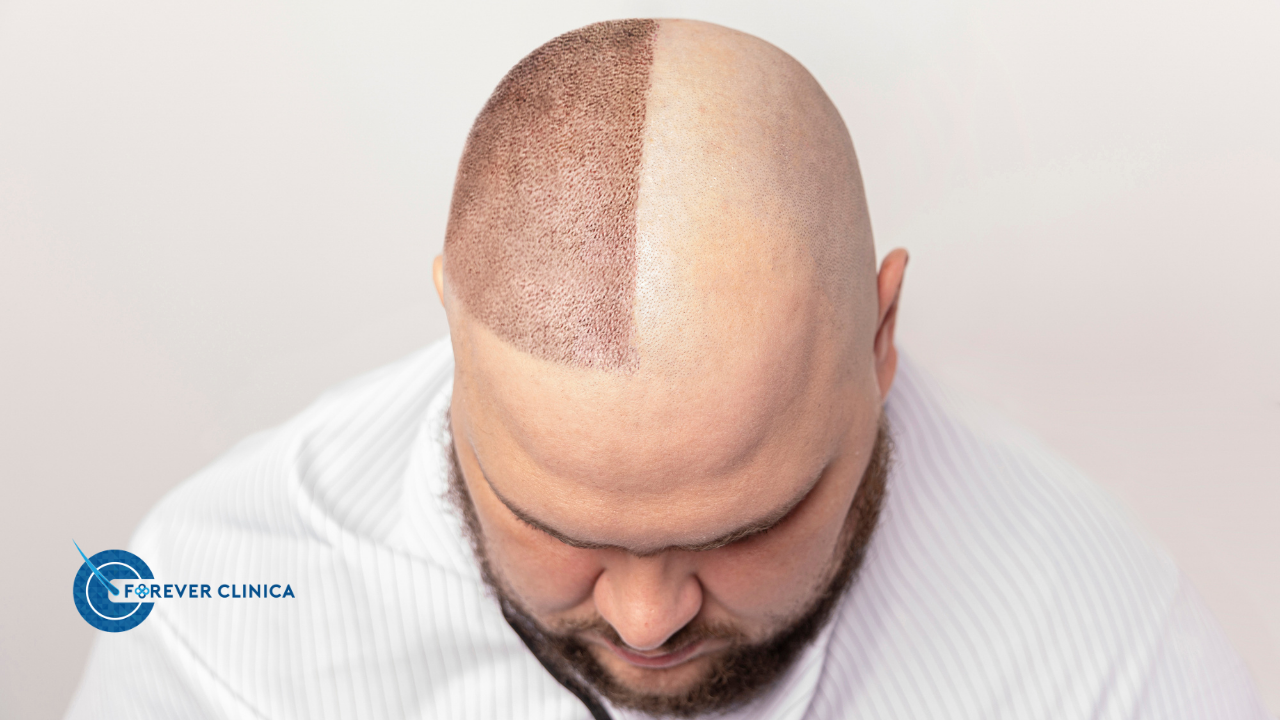
How to Relieve Pain, Itching, and Acne in the Donor Area After Hair Transplantation?

After a hair transplant, most people naturally focus on the transplanted area. Questions like “Will the grafts survive?”, “When will the scabs fall off?”, “When will my new hair start growing?” often come first. That is completely understandable.

However, there is another area that deserves just as much attention during recovery: the donor area.

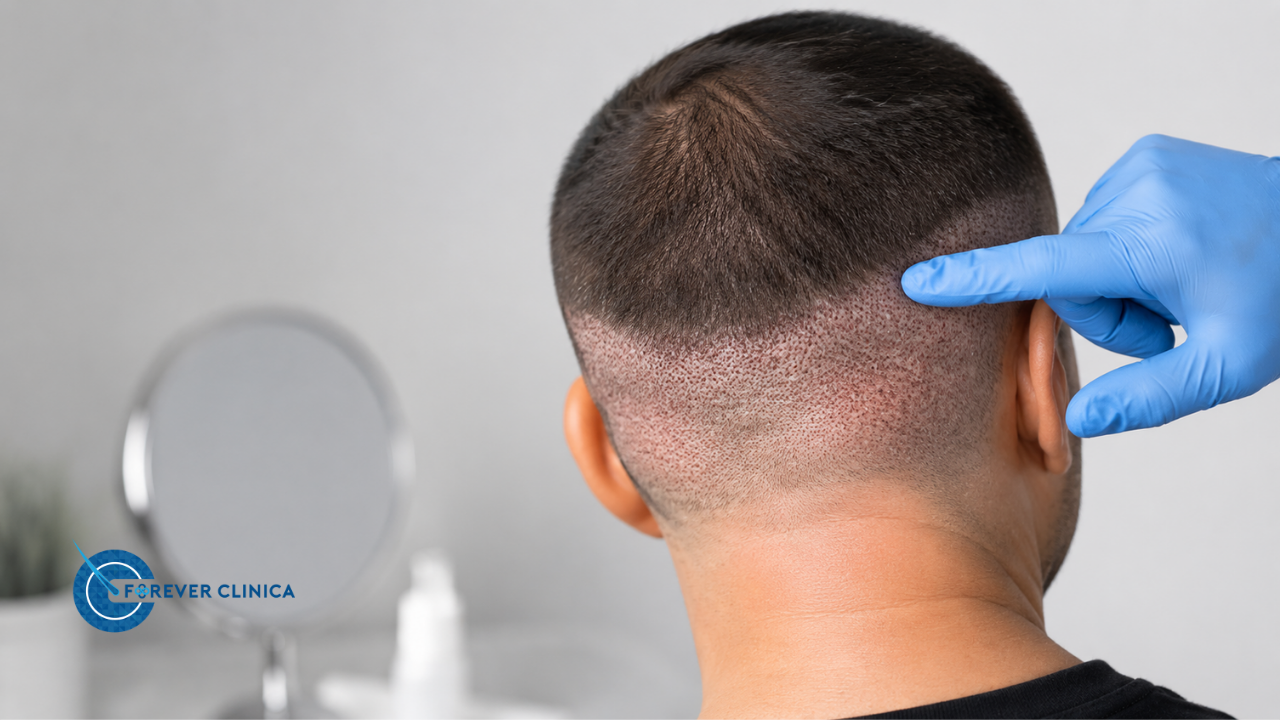
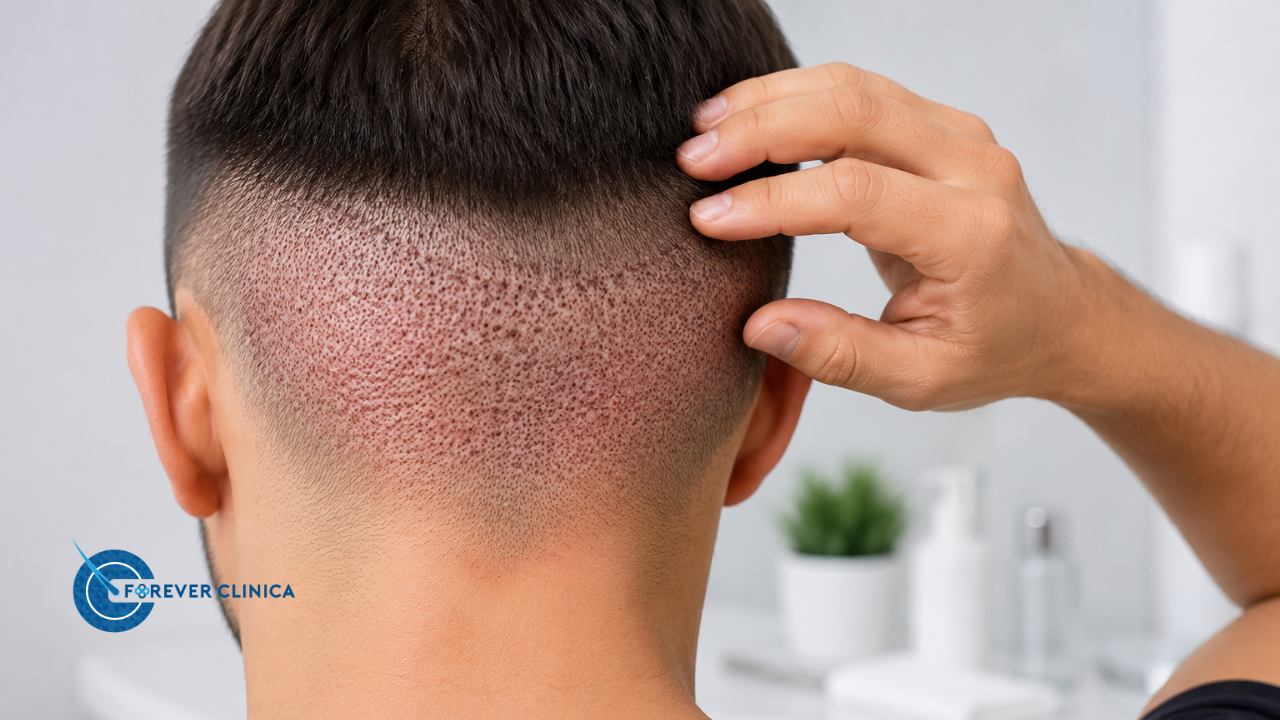
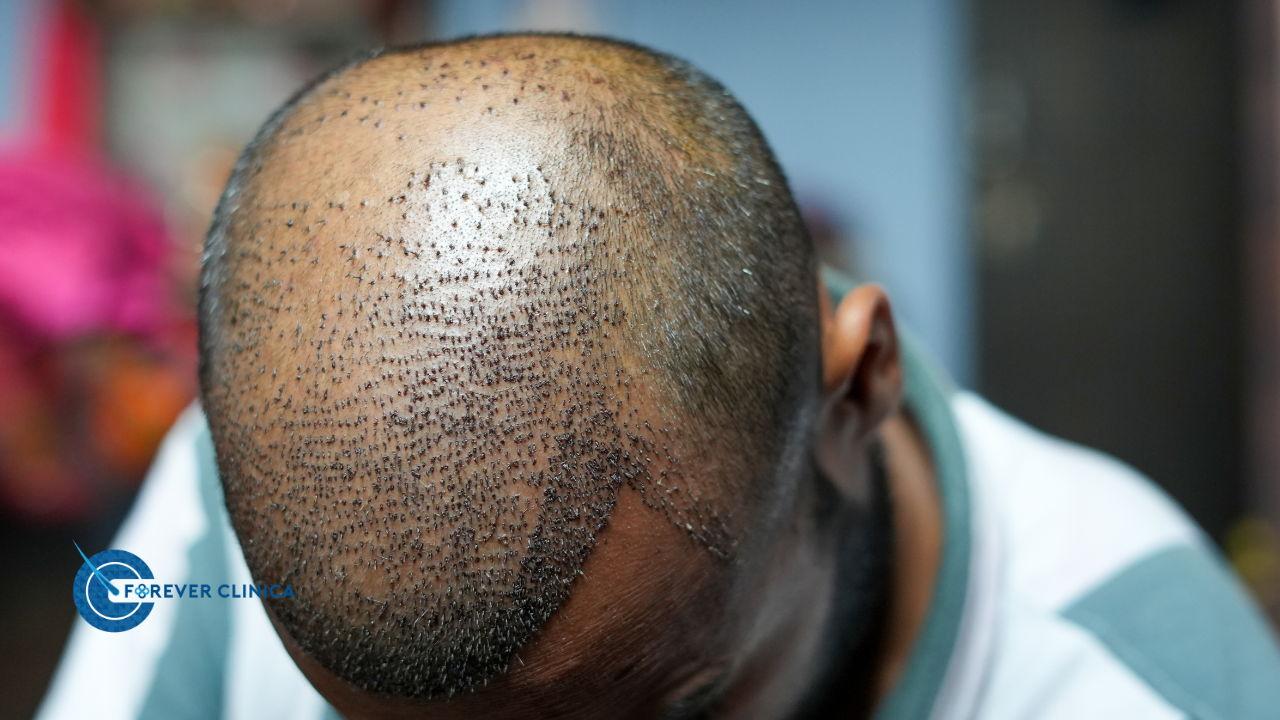
The donor area is the region where hair follicles are taken from during hair transplant surgery. In most cases, this is the back of the scalp, especially the nape area. After the procedure, it is common to experience sensitivity, mild pain, itching, redness, small pimples, or scabbing in this region.

So, are these symptoms normal? When should you be concerned? Should pimples in the donor area be squeezed? What can be done if itching becomes uncomfortable? How long does donor area pain usually last?

In this guide, we will discuss pain, itching and pimple-like bumps in the donor area after hair transplant in a clear, realistic and patient-friendly way.

Hair Transplantation

What Is the Donor Area in Hair Transplant?

The donor area is the region from which healthy hair follicles are collected during hair transplantation. In FUE hair transplant, hair follicles are usually extracted one by one from the back of the scalp.

During this extraction process, very small micro-openings are created in the skin. After the procedure, these tiny areas begin to heal. This healing phase may involve tenderness, mild pain, tightness, scabbing, itching or redness.

In many cases, these signs are part of the normal tissue repair process. However, not every symptom should automatically be considered normal. The severity, duration and progression of the symptom matter.

A mild discomfort that gradually decreases is usually different from pain that becomes worse day by day. This is why patients should follow the post-operative instructions given by their medical team and report unusual symptoms.

Why Does the Donor Area Become Sensitive After Hair Transplant?

During hair follicle extraction, the skin in the donor area experiences controlled micro-trauma. This does not mean something has gone wrong. It simply means that the skin has gone through a medical procedure and now needs time to repair itself.

The body responds by increasing blood flow, starting tissue repair and closing the tiny extraction points. During this process, patients may feel tightness, burning, tenderness, stinging or mild pain.

You can think of it like a small skin scratch healing. As the skin repairs itself, it may form scabs and become itchy. The donor area goes through a similar healing process, but on a larger and more organized scale.

The key point is this: symptoms should generally improve over time. If pain, redness, swelling or discharge increases instead of decreasing, the area should be evaluated by a healthcare professional.

Is Pain in the Donor Area Normal After Hair Transplant?

Mild to moderate pain in the donor area may be expected after hair transplant. Especially in the first few days, the back of the scalp may feel sensitive, tight or sore.

This discomfort is usually related to the healing of the micro-extraction points. The number of grafts taken, the duration of the procedure, the person’s skin structure, pain threshold and extraction technique can all influence the level of discomfort.

Some patients describe it as “just a mild sensitivity,” while others may feel more noticeable soreness during the first days. This difference is normal because every person heals differently.

How Long Does Donor Area Pain Last?

In many patients, donor area pain begins to decrease within the first few days. Noticeable relief is often expected within the first week. However, some people may continue to feel tightness, numbness or sensitivity when touching the area for a longer period.

The character of the pain is important. Pain that is mild, manageable and gradually improving is generally part of the expected recovery process. However, pain that becomes stronger, throbbing, hot, swollen or associated with discharge should not be ignored.

If the pain feels unusual or is getting worse, the safest approach is to contact the medical team that performed the procedure.

What Can Help Reduce Donor Area Pain?

The most important rule is to follow your physician’s instructions. Patients should not use random medications, creams or home remedies without medical approval.

In general, the following points may help protect the donor area during recovery:

Avoid pressure on the donor area. In the first days, friction from pillows, tight collars, hats or hard surfaces can increase sensitivity.

Pay attention to sleeping position. Your physician may recommend sleeping with your head elevated or supported in a certain way to protect both the transplanted area and the donor area.

Use pain relief only if recommended. Some painkillers may affect bleeding or bruising risk, so medication should be used according to medical advice.

Do not rub, scratch or aggressively wash the area. The skin is already healing, and unnecessary trauma may increase irritation.

Why Does the Donor Area Itch After Hair Transplant?

Itching is one of the most common complaints after hair transplant. In fact, some patients say itching is more annoying than pain. This is understandable because itching can be persistent and uncomfortable.

There are several possible reasons for itching in the donor area. One of the most common causes is skin healing. As the tiny extraction points close, scabs form and the skin renews itself, itching may occur.

Dryness can also contribute to itching. After hair transplant, special shampoos, cleansing routines, antiseptic products or temporary changes in the skin barrier may cause dryness. Dry skin tends to itch more.

Scabbing may also increase the urge to scratch. Scabs are part of the natural healing process, but picking or scratching them can irritate the skin and increase the risk of infection.

Is Donor Area Itching Normal?

Mild itching can be considered normal during the early recovery period. It is especially common during the scabbing and healing stages.

However, the intensity of itching matters. Mild and tolerable itching is usually part of recovery. Severe itching, spreading redness, blisters, discharge or rash-like reactions should be discussed with a physician.

Sometimes itching may be related to an allergic reaction or irritation caused by a product. For this reason, it is not always correct to say, “It is normal, it will pass,” without evaluating the whole picture.

What Can Help Reduce Itching?

The most important step is not to scratch the donor area. I know this is easier said than done. When an area itches, the natural instinct is to scratch it. But scratching with nails may damage the skin, remove scabs too early and increase irritation.

Follow the washing routine recommended by your clinic. If you were given a special shampoo, lotion or post-care protocol, use it exactly as instructed.

Avoid harsh or unknown products. Alcohol-based products, perfumes, random antiseptics, cosmetic oils or homemade mixtures may irritate the skin further.

Keep the scalp clean but do not over-clean. Excessive washing or harsh rubbing can dry the skin and make itching worse.

If itching becomes very uncomfortable, speak with your medical team. Your physician may recommend a suitable moisturizing approach, medication or adjustment in your care routine if necessary.

Why Do Pimples Appear in the Donor Area After Hair Transplant?

Small pimple-like bumps may appear in the donor area after hair transplant. This can worry patients because they may wonder, “Is this an infection?”

There are several reasons why pimple-like bumps may occur. Sometimes they are related to the healing process of the skin and hair follicles. Oil balance, scabbing, temporary irritation and post-operative care products may all play a role.

In some cases, folliculitis may develop. Folliculitis is inflammation of the hair follicle and may appear as small red, tender or pus-filled bumps. Mild cases may improve with proper care, while some cases may require medical treatment.

Are Pimples in the Donor Area Normal?

Small, limited and mild pimple-like bumps may be seen during the recovery period. However, if pimples increase in number, become painful, look inflamed, produce discharge or are accompanied by warmth and redness, the area should be evaluated.

If pimples are associated with worsening pain, bad smell, spreading redness, fever or general weakness, medical advice should be sought without delay.

A simple way to think about recovery is this: normal healing usually improves gradually. Infection or significant inflammation often gets worse instead of better.

Should Pimples in the Donor Area Be Popped?

No. Pimples or pimple-like bumps in the donor area should not be squeezed or popped.

Squeezing them may cause irritation, bleeding, infection spread or increased risk of scarring. The donor area is already sensitive after the procedure, so any unnecessary trauma can make recovery more difficult.

If the bumps become painful, inflamed or widespread, consult your physician. The medical team may recommend proper cleansing, topical treatment or another medical approach if needed.

How Should the Donor Area Be Cared For?

The safest donor area care is the one recommended by the medical team that performed your hair transplant. Each clinic may have its own washing routine, dressing protocol and product recommendations depending on the technique used.

Still, the general logic is similar: keep the area clean, avoid irritation, do not scratch, do not pick scabs and do not apply random products.

Donor Area Care in the First Days

In the first few days, the donor area may be sensitive. During this period, avoid direct pressure on the back of the scalp. Friction from pillows, collars, hats or rough contact may increase discomfort.

The timing of the first wash should be determined by your clinic. In some cases, the first wash is performed at the clinic. In others, the patient is given detailed instructions for washing at home.

Many patients think, “If I clean it more, it will heal faster.” But excessive intervention is not always helpful. Gentle care is often the foundation of healthy recovery.

What Should Be Considered During Washing?

When washing the donor area, avoid strong water pressure. Do not use nails. Do not rub the area aggressively. Do not try to remove scabs by force.

If your physician recommended a shampoo or lotion, apply it as instructed. Random products may dry or irritate the scalp.

After washing, do not rub the area harshly with a towel. The donor area should be dried gently or left to dry according to your clinic’s recommendations.

Care During the Scabbing Period

Scabbing is a natural part of healing after hair transplant. Small scabs may also form in the donor area. These scabs should not be picked, scratched or forcibly removed.

With proper washing and care, scabs usually soften and fall off over time. Patience is important here. Trying to remove scabs too early may irritate the skin.

If the scabs are causing intense itching, the best step is not to scratch them, but to contact your clinic and ask whether your care routine needs adjustment.

Is Numbness or Tingling in the Donor Area Normal?

Numbness, tingling or a stinging sensation may occur in the donor area after hair transplant. This may be related to temporary irritation of small nerve endings in the skin.

In many patients, these sensations gradually decrease. However, the recovery period varies from person to person. Some people feel better within a few weeks, while others may experience mild sensitivity for a longer time.

If numbness becomes worse, turns into severe pain or feels like intense electric shocks, it should be discussed with a physician. Not every symptom should be assumed to be part of normal recovery.

When Does Redness in the Donor Area Go Away?

Redness in the donor area may be expected after hair transplant. It may be more visible in people with fair or sensitive skin.

In general, redness should gradually decrease over time. Redness that is obvious in the first days should become lighter as healing progresses.

However, spreading redness, increasing warmth, pain, swelling or discharge should not be considered routine healing. These signs may require medical evaluation.

The direction of change is important. Redness that is improving is usually less concerning. Redness that is spreading or worsening should be checked.

What Are the Signs of Infection in the Donor Area?

Infection after hair transplant is not common, but it is important to recognize warning signs early. Early communication with the medical team can help manage possible problems more effectively.

You should contact your physician if you notice:

Pain that increases instead of decreasing

Spreading redness in the donor area

Warmth, swelling and tenderness

Pus-like discharge or bad smell

Fever or general weakness

Rapidly increasing pimple-like lesions

Severe pain or discharge under scabs

Persistent bleeding

If these symptoms occur, do not use random creams, antibiotics or herbal mixtures at home. Treatment should be planned after medical evaluation.

Are Pimples and Folliculitis the Same Thing?

Not every pimple is folliculitis, but some pimple-like bumps after hair transplant may be related to folliculitis. Folliculitis refers to inflammation or infection around the hair follicle.

Small, isolated and painless bumps may simply be related to healing. However, red, tender, pus-filled or painful bumps should be evaluated.

The correct distinction should be made by a physician. From the outside, scabs, pimples, ingrown hairs and inflamed lesions may look similar.

What Can Be Done at Home for Donor Area Pimples?

The safest thing to do at home is to keep the area clean and calm. Do not squeeze pimples. Do not pick scabs. Do not apply alcohol, cologne, random antibiotic creams or herbal products.

Continue the washing routine recommended by your clinic. If your products cause excessive dryness, burning or more itching, inform your medical team.

If the bumps are mild and not spreading, they may only need observation. But if there is pain, discharge, increasing redness or spreading lesions, medical evaluation is necessary.

Why Is Scratching the Donor Area Risky?

Scratching may feel relieving for a few seconds, but it can cause problems in the longer term. Nails can scratch the skin surface, remove scabs too early and introduce bacteria to the healing area.

During the first weeks, the donor area is still recovering. Mechanical trauma can increase irritation and delay comfort.

If itching becomes difficult to tolerate, do not try to solve it by scratching. Contact your clinic. Your physician can evaluate whether itching is related to dryness, healing, allergy or infection.

Daily Habits That May Support Donor Area Recovery

Recovery is not only about external products. Sleep, hydration, nutrition, hygiene and lifestyle habits can also affect the healing process.

Sleeping Position

In the early period, sleep in the position recommended by your physician. Protecting the scalp from friction and pressure can help reduce discomfort.

Using a clean pillowcase is also important. Sweat, oil and dirt may irritate the healing skin.

Controlling Sweating

Heavy exercise, sauna, steam rooms or hot environments may increase sweating during the early recovery period. Sweat may trigger itching or irritation on sensitive skin.

Avoid intense activity until your physician allows it. This is not about being overly cautious; it is about giving the skin time to heal calmly.

Nutrition and Hydration

Balanced nutrition supports tissue repair. Adequate protein, vitamins and minerals may contribute to the body’s healing capacity.

Hydration is also valuable for skin health. Drinking water alone will not solve pimples or itching, but it supports general recovery.

Smoking and Alcohol

Smoking may negatively affect blood circulation. Alcohol may contribute to swelling, bleeding risk or delayed recovery in some individuals.

Your medical team may recommend avoiding smoking and alcohol for a certain period after hair transplant. It is best to follow the instructions given specifically for your case.

What Should Not Be Done to the Donor Area?

Sometimes patients try to speed up healing and unintentionally irritate the skin. The following should generally be avoided unless your physician says otherwise:

Do not scratch the donor area with your nails.

Do not squeeze or pop pimple-like bumps.

Do not pick or forcefully remove scabs.

Do not apply random creams, oils, lotions or herbal mixtures.

Do not massage the area aggressively.

Do not wash with very hot water.

Do not wear tight hats or clothing that rubs against the donor area.

Do not use medications outside your physician’s recommendations.

These may sound like small details, but after hair transplant, small mistakes may create unnecessary discomfort.

Why Does the Donor Area Cause Anxiety After Hair Transplant?

After hair transplant, many patients check the mirror frequently, take photos and compare their progress day by day. This is very common. Hair transplant is not only a physical process; it is also emotionally important for many people.

A few pimples in the donor area can make someone worry: “Is my scalp healing incorrectly?”, “Will there be a scar?”, “Did something go wrong?”

The healthiest approach is neither panic nor complete neglect. Mild pain, itching, scabbing and limited bumps may be part of recovery. But symptoms that worsen should be taken seriously.

Balanced observation is the key. Watch the healing process, follow instructions and communicate with your clinic when something feels unusual.

Donor Area Care and Health Tourism in Istanbul, Turkey

Forever Clinica is a health tourism agency in Turkey that may support international patients with planning, communication and coordination during their hair transplant journey. For patients traveling to Istanbul, Turkey, post-operative care is especially important because many questions may arise after the procedure.

Pain, itching, pimples, redness and scabbing in the donor area should be explained clearly to patients. They should know which symptoms may be part of expected healing and which symptoms require medical contact.

A good hair transplant experience is not limited to the operation day. Post-operative care, follow-up, proper communication and realistic expectations are also essential parts of the process.

For international patients, organization support such as appointment planning, translation, accommodation, transfer coordination and post-procedure guidance can make the journey easier to understand. However, all medical decisions and treatment recommendations should be made by authorized healthcare professionals.

When Should Donor Area Symptoms Be Taken Seriously?

You should contact your physician if:

Pain gets worse day by day

Itching becomes unbearable

Pimple-like bumps spread quickly

There is pus or discharge

Redness spreads

The area becomes hot and swollen

Fever or weakness occurs

There is a bad smell

Bleeding continues

Numbness becomes worse or turns into severe pain

These symptoms do not always mean there is a serious problem, but they should be evaluated. Early communication can help prevent small issues from becoming bigger concerns.

When Does the Donor Area Feel Comfortable Again?

The recovery timeline varies from person to person. Pain and sensitivity may be more noticeable in the first few days. Many patients begin to feel more comfortable within the first week.

Scabbing and itching may appear at different stages of healing. Some patients recover quickly, while others may experience mild redness, tightness, numbness or sensitivity for a longer period.

The overall trend matters. If symptoms are decreasing and the skin looks calmer, recovery is usually moving in the expected direction. If symptoms increase or new problems appear, a check-up is recommended.

Conclusion: Donor Area Care Is a Quiet but Important Part of Hair Transplant Recovery

Pain, itching and pimple-like bumps in the donor area after hair transplant are common concerns. Mild pain, scabbing, itching and limited sensitivity may be part of the healing process. However, these symptoms should be monitored carefully.

Do not scratch the donor area. Do not squeeze pimples. Do not pick scabs. Follow your clinic’s washing and care instructions. If something seems unusual, contact your medical team instead of trying random solutions at home.

Hair transplant recovery is not only about the transplanted area. The donor area also needs time, care and protection. A calm recovery process depends on patience, proper hygiene and clear communication with healthcare professionals.

For patients considering hair transplant in Istanbul, Turkey, understanding the donor area recovery process before the procedure can make the experience more comfortable and realistic.

Frequently Asked Questions

Is pain in the donor area normal after hair transplant?

Yes, mild or moderate pain and sensitivity in the donor area may occur after hair transplant. This is usually related to the healing of the tiny extraction points. However, worsening pain should be discussed with a physician.

How long does donor area pain last?

In many patients, pain begins to decrease within the first few days and noticeable relief may occur within the first week. The duration may vary depending on skin structure, procedure intensity and personal healing response.

Why does the donor area itch after hair transplant?

Itching may occur due to skin healing, scabbing, dryness or sensitivity to care products. Mild itching can be expected, but severe or spreading itching should be evaluated.

What should I do if the donor area itches?

Do not scratch the area with your nails. Continue the washing and care routine recommended by your clinic. If itching is severe, contact your medical team.

Is it normal to have pimples in the donor area?

Small and limited pimple-like bumps may appear during recovery. However, painful, inflamed, spreading or pus-filled bumps should be checked by a physician.

Should donor area pimples be popped?

No. Pimples or bumps in the donor area should not be squeezed or popped. This may increase irritation, infection risk and scarring risk.

When does redness in the donor area go away?

Redness usually decreases gradually over time. It may be more visible in fair or sensitive skin. Spreading redness, warmth, pain or discharge should be evaluated.

Is numbness in the donor area normal?

Temporary numbness, tingling or stinging may occur after hair transplant. It often improves over time. Severe or worsening numbness should be discussed with a physician.

How should the donor area be washed?

The donor area should be washed gently according to the clinic’s instructions. Avoid strong water pressure, scratching with nails and forcefully removing scabs.

Can I apply cream to the donor area?

Do not apply random creams, oils, lotions or herbal products unless recommended by your physician. Incorrect products may irritate the skin.

How can I recognize infection in the donor area?

Increasing pain, spreading redness, warmth, swelling, pus-like discharge, bad smell, fever or general weakness may require medical evaluation.

When does the donor area fully heal?

Initial healing usually begins within days, but full skin calming varies from person to person. Mild redness, sensitivity or numbness may last longer in some patients.

Should scabs in the donor area be removed?

No. Scabs should not be picked or removed forcefully. They usually soften and fall off gradually with proper washing and care.

Can a hat irritate the donor area?

Yes, tight or rough hats may irritate the donor area in the early period. Follow your physician’s guidance on when and how to wear a hat.

What is the most important rule for donor area care?

Keep the area clean, avoid scratching, do not squeeze pimples, do not pick scabs and follow your physician’s post-operative instructions.

What is Temple Filler? How is it done?

What Is Temple Filler? How Is It Done?

There are some changes in the face that we notice immediately, yet we may not know exactly how to describe them. A person may look in the mirror and say, “My face looks tired,” “My eye area seems hollow,” “My cheekbones do not look as balanced as before,” or “There is a sunken look on the sides of my forehead.”

In many cases, these observations are related to one often-overlooked area: the temples.

The temple area is one of the quietest but most influential regions of the face. It may not attract attention as quickly as the lips, nose, or cheeks, yet it plays an important role in how youthful, balanced, and rested the face appears. When volume loss occurs in this area, the face may look more tired, sharper, older, or more hollow than the person actually feels.

So, what exactly is temple filler? Is it needed for every hollow temple? How is it performed, how long does it take, and is the result permanent? Let’s examine the topic in a clear, realistic, and patient-friendly way.

Temple Filler

What Is Temple Filler?

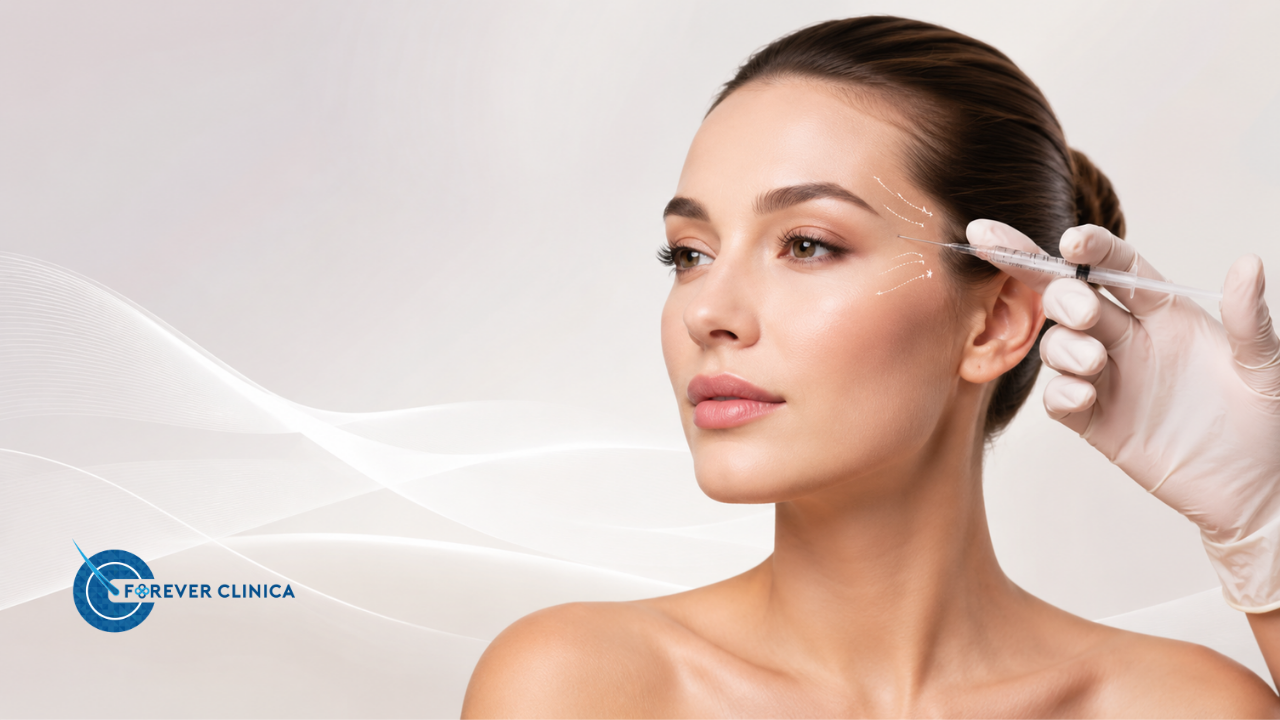
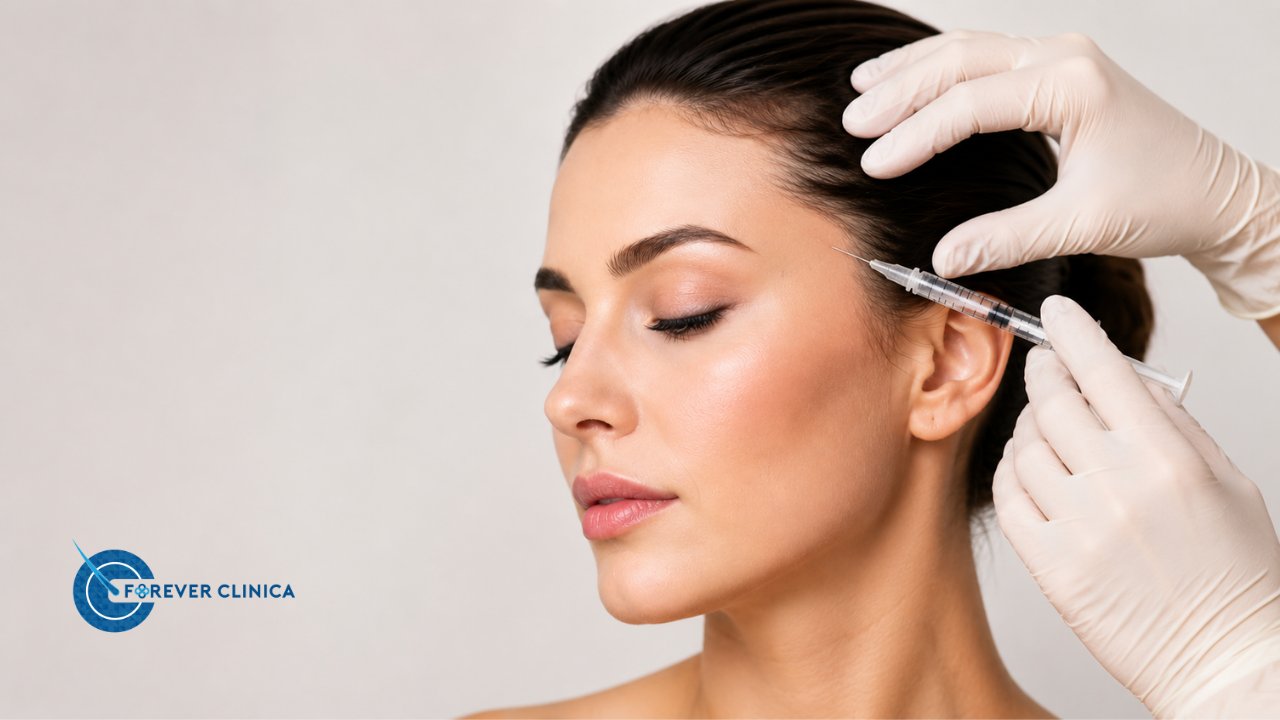
Temple filler is a non-surgical medical aesthetic procedure used to support volume loss in the temple area, which is located on the upper side of the face. In this procedure, hyaluronic acid-based fillers or other filler materials deemed appropriate by the physician may be used.

The temple area is located between the outer edge of the eyebrow and the hairline. In younger facial anatomy, this area usually appears fuller and has a softer transition between the forehead, eye area, and cheekbone. However, due to aging, genetic structure, weight loss, facial anatomy, intense exercise, or changes in connective tissue, the temples may gradually appear more hollow.

The goal of temple filler is not to change the face in an artificial way. The main aim is to provide controlled volume support and create a smoother transition between the upper and mid-face. This is why temple filler should never be seen as a standard procedure performed in the same way for everyone.

For some people, a very subtle amount of support may be enough. For others, a more detailed facial assessment may be necessary. In some cases, the issue may not be limited to the temple area alone; the cheekbones, eye area, brow support, and mid-face volume may also need to be evaluated together.

Why Does the Temple Area Affect Facial Expression So Much?

Think of the temple area as the side support of a building. At first glance, it may not seem like the most noticeable part. But when that side support weakens, the entire structure may look different.

The same idea applies to the face.

When the temples lose volume, the outer part of the eyebrow may appear less supported. The eye area may look more tired. A sharper transition may appear between the forehead and cheekbone. The upper face may look narrower, while the lower face may appear heavier or more dominant.

Many people describe this as, “My face looks thinner, but not in a healthy way.” In reality, the issue is not simply thinness. It is often related to changes in the distribution of facial volume.

This can become more visible in photos. When light falls into the hollow temple area, shadowing may increase. This shadow can make the face appear tired, aged, or less balanced.

Why Does Temple Hollowing Occur?

There is not a single reason for temple hollowing. In most cases, several factors work together.

Aging

With age, changes occur in facial fat pads, bone structure, muscles, and connective tissue. Skin elasticity may decrease, and volume loss may become more visible in certain facial regions. The temple area is one of the areas that may be affected by this process.

This does not happen at the same speed for everyone. In some people, temple hollowing may become visible in their 30s. In others, it may appear later.

Genetic Facial Structure

Some people naturally have a more hollow temple area. This may not be related to aging at all. A person may have a naturally thin, angular, or bony facial structure from a young age.

Genetics plays an important role here. If similar facial features are present in family members, temple hollowing may be noticed earlier.

Rapid Weight Loss

Losing weight in a short period of time can affect facial volume. The cheeks, under-eye area, and temples may show this change more clearly.

After weight loss, the body may look fitter, yet the face may appear more tired or hollow. This can be especially noticeable in people who already have a naturally thin face.

Intense Exercise and Low Body Fat

Regular exercise is a healthy habit, but very low body fat may make facial volume loss more visible in some individuals. People with lean facial structures may notice sharper lines around the temples and cheeks.

This does not mean that every volume loss is a “problem.” The person’s expectations, facial proportions, and physician evaluation should be considered together.

Jaw Clenching and Prominent Jaw Muscles

In some people, prominent masseter muscles may make the lower face appear stronger or wider. When the lower face becomes visually dominant, the upper face may seem narrower or more hollow.

In such cases, a person may think the problem is only in the temple area. However, the entire face should be evaluated before making a treatment plan.

What Is Temple Filler Used For?

Temple filler is mainly planned to support volume loss. However, this support may create a visual effect in different parts of the face.

Softening Temple Hollowing

The primary goal is to soften the hollow or sunken appearance in the temple area. With filler, controlled volume support can be provided to the region.

This may help reduce shadowing on the upper side of the face. As a result, the face may appear more rested and balanced.

Supporting the Outer Brow Area

The temple area is closely related to the outer part of the eyebrow. Therefore, temple support may contribute to a more balanced appearance around the brow area in some individuals.

However, this point must be clear: temple filler is not a brow lift procedure. It may indirectly affect the appearance around the brow by supporting volume loss, but it does not replace surgical or non-surgical brow lifting methods.

Creating a Smoother Transition Between the Upper and Mid-Face

The temple is a transition zone between the forehead, eye area, and cheekbone. When hollowing occurs in this region, facial contours may look sharper or more tired.

The goal of filler treatment is to soften this transition in a natural-looking way. A well-planned temple filler should not make people say, “You had filler.” Ideally, it should create the impression of a more rested and balanced face.

Supporting Facial Proportion

Focusing on only one part of the face can sometimes be misleading. When the temple area loses volume, the lower face may appear visually heavier. This can create a sense of imbalance in facial proportions.

In suitable individuals, temple filler may be considered to support the upper face and contribute to a more harmonious overall appearance.

How Is Temple Filler Performed?

Temple filler is an injection-based medical aesthetic procedure planned after a physician’s assessment. Before the treatment, the person’s facial anatomy, degree of temple hollowing, skin quality, vascular risk areas, previous procedures, and expectations should be evaluated.

Filler procedures are often completed in a relatively short time. However, the fact that a procedure is quick does not mean it is simple or unimportant. The temple region is anatomically sensitive and requires careful planning.

This is why temple filler should be performed by qualified healthcare professionals in appropriate clinical conditions.

Initial Consultation and Facial Analysis

The first step is facial analysis. The physician does not evaluate only the temple area. The forehead, eyebrows, eye area, cheekbones, cheeks, jawline, and overall facial proportions should be assessed together.

The person’s expectation is also important. Some people want a visible change, while others prefer a very subtle improvement in tired appearance. A healthy treatment plan starts with understanding whether the expectation is realistic.

Preparing the Treatment Area

Before the procedure, the treatment area is cleaned. If needed, a topical anesthetic cream may be applied. Some filler products also contain local anesthetic agents, which may increase comfort during the procedure.

Sterile conditions are very important. Injections performed without proper skin cleansing and clinical standards may increase the risk of infection.

Choosing the Filler Material

The filler material used in the temple area is selected according to the person’s needs. Hyaluronic acid-based fillers are among the commonly preferred options. Hyaluronic acid is a molecule naturally found in the body and is known for its water-binding properties.

However, not all hyaluronic acid fillers are the same. Their density, elasticity, lifting capacity, and tissue integration may differ. Product selection is especially important in an area like the temples, where deeper support may be required.

At this stage, the quality of the product matters, but the injection plan matters just as much. A good filler result is not created by the product alone. It depends on anatomy, technique, proportion, and a measured approach.

Needle or Cannula Technique

Temple filler may be applied with a needle or a cannula. The choice depends on the physician’s assessment, the person’s anatomy, and the treatment plan.

A cannula is a thin instrument with a blunt tip. In some cases, it may help the practitioner move more gently through the tissue. A needle may be preferred for more targeted placement in specific points.

It would not be correct to say that one technique is always better than the other. The safest and most appropriate approach should be determined according to individual anatomy.

Controlled Volume Placement

Using more filler does not always mean achieving a better result. In fact, the temple area may look unnatural if it is overfilled.

The general goal is to create a subtle and soft transition. For this reason, the physician may plan the procedure gradually. In some people, one session may be sufficient, while in others, a controlled touch-up may be considered later.

Is Temple Filler Painful?

This is one of the most common questions. Since the temple area is sensitive, a person may feel pressure, tightness, or mild discomfort during the procedure. However, many people describe the sensation as tolerable.

Topical anesthetic cream or anesthetic-containing filler products may improve comfort. Still, pain tolerance varies from person to person. Some individuals feel very little discomfort, while others may experience temporary sensitivity.

In many cases, uncertainty creates more anxiety than the procedure itself. When the physician clearly explains the process, the patient often feels more comfortable.

Who May Be Suitable for Temple Filler?

Temple filler may be considered for individuals who have volume loss or hollowing in the temple area. However, suitability should not be decided only by looking in the mirror.

People with Visible Temple Hollowing

People with inward hollowing, shadowing, or a bony appearance in the temples may be evaluated for this procedure. If this appearance affects overall facial balance, filler may be discussed as an option.

People Concerned About a Tired Facial Expression

Some people look tired even when they are well-rested. The reason may not only be under-eye darkness. Temple and mid-face volume loss may also contribute to this tired appearance.

In such cases, temple filler may be evaluated alone or together with other supportive procedures.

People Seeking Softer Facial Transitions

A deep temple hollow may create a sharp transition between the forehead and cheekbone. People who want a softer facial transition may be suitable candidates after medical evaluation.

People with Facial Volume Loss After Weight Loss

After rapid weight loss, volume loss may appear in the upper side of the face. A person may be happy with their overall body change but may wish to balance facial hollowing.

In such cases, treatment should ideally be evaluated after the person’s weight has stabilized. Ongoing rapid weight changes may affect aesthetic planning.

Who May Not Be Suitable for Temple Filler?

Like all medical aesthetic procedures, temple filler is not suitable for everyone. This is especially important because some procedures can look very simple on social media. In reality, the person’s health condition, medication use, and medical history must be considered.

Filler procedures are generally postponed during pregnancy and breastfeeding. Active infection, skin problems in the treatment area, known hypersensitivity to filler ingredients, uncontrolled systemic diseases, or bleeding disorders may make the procedure unsuitable.

People who use blood-thinning medication may have a higher risk of bruising or bleeding. These medications should never be stopped without medical advice.

People who previously had facial fillers should also inform the physician about the product used and the date of application. Previous filler material may affect the new treatment plan.

When Does Temple Filler Show Its Effect?

With hyaluronic acid-based fillers, volume support may often be noticed immediately after the procedure. However, mild swelling, tenderness, or edema may occur, so the final appearance should not be judged right away.

In the first few days, the area may feel slightly fuller. As swelling decreases, the result begins to settle. This process varies from person to person.

Some people may say, “It looked fuller on the first day, then it decreased a little.” This is often related to early swelling going down. For this reason, a follow-up appointment is useful for evaluating the real outcome.

How Long Does Temple Filler Last?

The longevity of temple filler may vary depending on the filler material, metabolism, age, lifestyle, amount used, and the structure of the treatment area. Hyaluronic acid-based fillers are temporary.

In some people, the effect may last longer. In others, it may decrease sooner. Intense exercise, fast metabolism, weight changes, and tissue characteristics may influence duration.

Realistic expectations are important. Filler procedures should not be considered permanent transformations. Follow-up and possible maintenance can be planned according to the person’s needs and the physician’s evaluation.

Does Temple Filler Look Natural?

A well-planned temple filler can look natural. In many cases, people around the patient may not say, “You had filler.” Instead, they may simply notice that the face looks more rested or balanced.

The key to a natural result is proper patient selection, correct product choice, appropriate amount, and accurate injection planning. If the temple area is overfilled, the face may look swollen or artificial.

Sometimes, when a physician says, “Let’s not add more filler to this area,” that is actually a good sign. In aesthetics, knowing where to stop is just as important as knowing how to perform the procedure.

What Should Be Considered After Temple Filler?

Post-procedure instructions may vary depending on the physician’s recommendations. In general, pressure on the treated area should be avoided during the early period. The area should not be rubbed or massaged unless the physician specifically advises it.

Heavy exercise, sauna, steam rooms, intense sun exposure, and solarium may be avoided for the first 24 hours, depending on the physician’s instructions. Mild swelling or bruising may occur and is often temporary.

However, unexpected severe pain, skin discoloration, paleness, intense bruising, visual changes, or significant tenderness may require urgent medical evaluation. Although serious complications are rare, they are not impossible.

Are There Risks of Temple Filler?

Yes. As with any injection procedure, temple filler has possible risks. Common temporary effects may include swelling, bruising, redness, tenderness, mild pain, or small bumps at the injection site.

Less commonly, asymmetry, nodules, infection, product palpability, or filler migration may occur. Very rare but serious complications may include vascular compromise, which can affect the skin or surrounding tissues.

For this reason, temple filler should not be viewed as a simple beauty treatment. Knowledge of facial anatomy, sterile technique, proper product selection, and complication management are all important.

Fillers purchased online, home applications, or procedures performed in uncontrolled environments may carry serious risks. Filler injections should be performed by qualified healthcare professionals in suitable clinical settings.

Is Temple Filler the Same as a Facelift?

No, temple filler is not the same as a facelift. Filler is used to support areas with volume loss. A facelift is a surgical procedure that addresses tissue laxity and sagging through a different approach.

People sometimes confuse fillers with surgical procedures because both can affect facial appearance. However, their mechanisms, techniques, recovery processes, and goals are different.

Temple filler is mostly considered for volume loss and transition irregularities. If there is significant skin laxity, advanced tissue sagging, or other anatomical concerns, different treatment options may need to be discussed.

Does Temple Filler Affect the Eye Area?

The temple area is anatomically close to the eye region. For this reason, supporting temple volume may help the eye area appear more balanced in some people. However, this effect varies from person to person.

Under-eye hollowing, eyelid position, brow position, and skin quality should be evaluated separately. Temple filler does not solve every concern around the eyes.

So, instead of thinking, “My eyes look tired, I need temple filler,” it is healthier to have a full facial assessment.

Temple Filler vs. Cheekbone Filler

Temple filler supports the upper side of the face, while cheekbone filler focuses on the mid-face. Although these areas are connected, their aesthetic effects are different.

Cheekbone filler may support mid-face projection. Temple filler may soften the transition between the forehead, outer brow, and upper cheekbone area.

In some individuals, both areas may be evaluated together. However, the goal should never be to simply “fill the face.” The goal is to understand proportion and support the face in a balanced way.

Can Men Have Temple Filler?

Yes, temple filler may also be considered for men. In male facial anatomy, the temple area works together with the forehead and jawline to create facial balance. However, planning for men may differ from planning for women.

In male faces, an overly soft or rounded upper-face appearance may not be desired. Therefore, product selection, filler amount, and the expected result should be carefully planned.

For men, the goal is usually a more rested, balanced, and healthy-looking facial expression. An artificial change is not the aim.

Temple Filler and Health Tourism in Istanbul, Turkey

Forever Clinica is a health tourism agency in Turkey that may support international patients with process planning and coordination. For patients traveling to Istanbul, Turkey, for medical aesthetic procedures, clear communication and realistic expectations are especially important.

Temple filler, like other injection-based aesthetic procedures, must be evaluated and performed by authorized physicians in appropriate healthcare settings. Forever Clinica may assist with organization, communication, planning, and travel-related support, while medical decisions and applications remain under the responsibility of qualified healthcare professionals.

For international patients, photo-based preliminary evaluation may provide an initial idea in some cases. However, a face-to-face medical assessment in Istanbul, Turkey, may still be necessary to evaluate anatomy, suitability, and treatment planning more accurately.

Travel planning should also consider the possibility of temporary swelling or bruising. Even though many people return to daily life quickly after filler procedures, each person’s healing response is different.

For patients coming from abroad, support with translation, appointment planning, accommodation, transfers, and follow-up coordination may make the process easier to understand. Still, the actual medical decision should always be based on the physician’s examination.

What Questions Should Be Asked Before Temple Filler?

Asking questions before a procedure is one of the healthiest ways to make an informed decision. Some people hesitate and wonder, “Would I be misunderstood if I ask too many questions?” In reality, questions are valuable in a responsible medical process.

Before temple filler, the following questions may be helpful:

“Do I really need filler in my temple area?”

“What type of filler material will be used?”

“At what depth and with which technique will the filler be applied?”

“Is there any anatomical risk in my case?”

“How soon can I return to social life after the procedure?”

“What should I do if an unexpected reaction occurs?”

“Could my previous aesthetic procedures affect this treatment?”

Clear answers to these questions may help the person feel more informed and comfortable.

What Should Realistic Expectations Be?

Temple filler should not be viewed as a procedure that completely changes the face. It is mainly used to support volume loss in the upper side of the face and soften facial transitions.

A realistic expectation may be a more balanced, rested, and smoother facial expression. However, results vary from person to person. Skin quality, bone structure, age, tissue response, and treatment planning all affect the outcome.

Sometimes the best approach is to start with a conservative amount and proceed gradually if needed. In facial aesthetics, the most difficult issue is often not doing too little, but doing too much.

Is Follow-Up Necessary After Temple Filler?

Yes, follow-up can be important. Since swelling and tenderness may occur in the early period, the final result should not be evaluated immediately. The physician may recommend a follow-up visit after a certain period.

During this visit, filler placement, symmetry, volume adequacy, and patient feedback may be assessed. If needed, minor adjustments may be considered.

Follow-up is not only important for aesthetic assessment. It is also useful for safety, patient reassurance, and answering questions that may arise after the procedure.

What Should You Pay Attention to When Considering Temple Filler?

Anyone considering temple filler should first ask who will perform the procedure, where it will be performed, and what product will be used. Procedures promoted with exaggerated promises, very low prices, or unrealistic social media claims should be approached carefully.

Filler injection is a medical procedure. Product authenticity, storage conditions, sterile environment, practitioner qualification, and complication management are important.

This is even more critical in areas such as the temples, where blood vessels and nerves require anatomical precision. For this reason, decisions should not be based only on price or before-after images.

Common Misconceptions About Temple Filler

“Temple filler gives the same result in everyone.”

No. Every face has a different anatomy. The same amount of filler may create completely different effects in two different people.

“The more filler is used, the better the result.”

This is not true. Too much filler in the temple area may create an unnatural appearance. A measured approach is usually healthier.

“The final result is visible immediately.”

The early appearance may be affected by swelling. The result may need some time to settle.

“Filler is completely risk-free.”

No injection procedure is completely risk-free. Risks can be reduced, but they cannot be ignored.

“Temple filler definitely lifts the eyebrows.”

Temple filler may indirectly support the outer brow area in some people, but it is not a brow lift procedure. Definite claims like this can be misleading.

Can Temple Filler Help Create a More Balanced Facial Expression?

In suitable individuals, with proper planning, temple filler may contribute to a more balanced facial expression. Here, we are not only talking about “looking younger.” We are talking about supporting the face’s own natural proportions.

In my observation, many people do not actually want a dramatic change. They want small, well-planned touches. They want to look like themselves, only more rested and balanced.

Temple filler may be a valuable option in facial aesthetics when carefully planned. But it always requires an individualized assessment. Because in aesthetics, the best result is often the one that does not look obvious.

Conclusion: A Small Area with a Noticeable Impact

The temple area is often overlooked in facial aesthetics. Yet when we consider the overall expression of the face, it plays a very important role. Volume loss in this area may make a person appear tired, thin, or older than they feel.

Temple filler is a medical aesthetic procedure that may be considered in suitable individuals to support volume loss and create a softer transition between the upper and mid-face. However, it must be planned according to personal anatomy, health status, expectations, and physician evaluation.

For Forever Clinica, a health tourism agency in Turkey, the main approach is to support patients with clear information and organized process planning. For international patients considering temple filler in Istanbul, Turkey, the most important step is not rushing into a procedure, but understanding whether the procedure is truly suitable.

Aesthetic procedures should not aim to create one standard beauty ideal. They should respect the person’s facial structure, health, natural expression, and realistic expectations.

Frequently Asked Questions

What is temple filler?

Temple filler is an injection-based medical aesthetic procedure used to support volume loss in the temple area. Hyaluronic acid-based fillers are commonly used, but the product choice depends on the physician’s assessment.

How is temple filler performed?

Before the procedure, facial analysis is performed and the treatment area is cleaned. The filler is then placed into the temple area using a needle or cannula according to the physician’s plan.

Is temple filler painful?

Mild pressure, tightness, or sensitivity may be felt during the procedure. Topical anesthetic cream or anesthetic-containing filler products may improve comfort. Pain tolerance varies from person to person.

How long does temple filler last?

The duration may vary depending on the filler material, metabolism, lifestyle, treatment amount, and tissue characteristics. Hyaluronic acid-based fillers are temporary, and the effect differs from person to person.

Is the effect visible immediately?

Volume support may be noticed right after the procedure. However, early swelling may affect the first appearance, so the final result should be evaluated after the tissue settles.

Does temple filler look natural?

When performed with the right amount, correct product, and proper technique, temple filler may create a natural-looking result. Overfilling may lead to an artificial appearance.

Does temple filler lift the eyebrows?

Temple filler is not a brow lift procedure. However, in some people, supporting the temple area may contribute to a more balanced appearance around the outer brow.

Who may be suitable for temple filler?

People with volume loss, hollowing, or shadowing in the temple area may be evaluated for temple filler. Suitability depends on facial anatomy, health condition, and physician assessment.

Who should not have temple filler?

Temple filler may not be suitable during pregnancy, breastfeeding, active infection, skin problems in the treatment area, known filler sensitivity, or certain uncontrolled medical conditions. A physician should make the final decision.

Can bruising occur after temple filler?

Yes, bruising, swelling, or tenderness may occur after injection-based procedures. These effects are usually temporary, but unexpected severe pain, skin color changes, or intense sensitivity should be medically evaluated.

Is temple filler safe?

Risks can be reduced when the procedure is performed with suitable products, sterile conditions, correct technique, and qualified healthcare professionals. However, no filler procedure is completely risk-free.

Does temple filler change the face?

The aim is not to completely change the face. The goal is to support volume loss in the temple area and create a more balanced transition in the upper face.

Can men have temple filler?

Yes, temple filler may be considered for men. However, male facial anatomy and aesthetic goals are different, so planning should be individualized.

What should be avoided after temple filler?

Pressure, rubbing, heavy exercise, excessive heat, sauna, steam rooms, and intense sun exposure may be avoided during the early period, depending on the physician’s advice.

Can temple filler be planned as part of health tourism?

Yes, international patients may consider temple filler as part of a medical aesthetic travel plan in Istanbul, Turkey. Forever Clinica may support the organization and coordination process, while medical evaluation and treatment decisions should be made by authorized physicians.

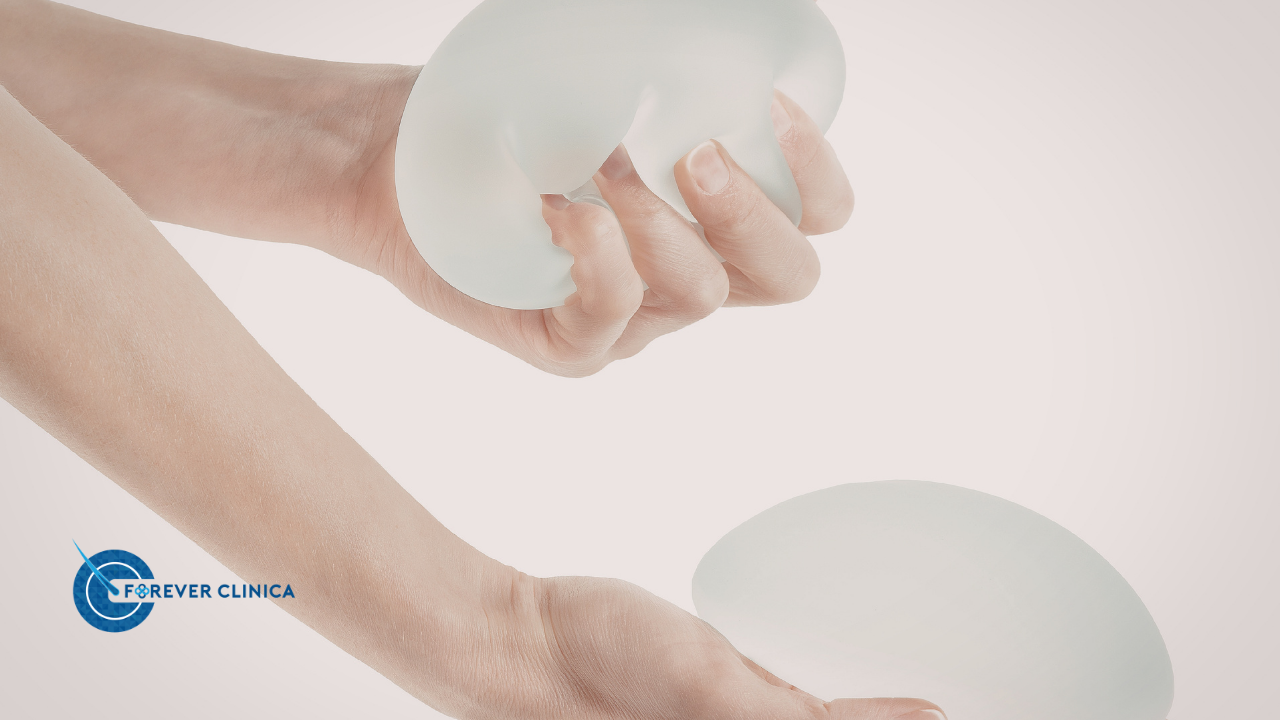
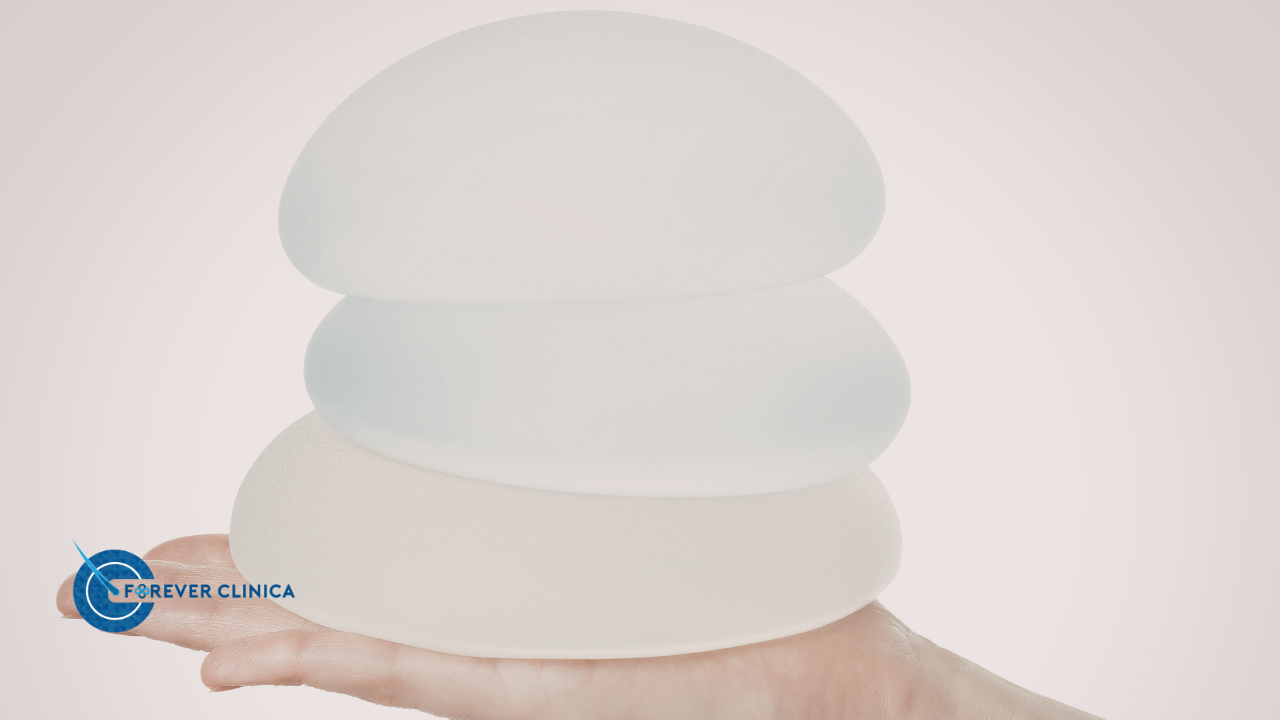
In breast augmentation, ‘teardrop’ or ’round’ implant?

How you want to see yourself in the mirror is the most personal and perhaps the most important question in aesthetic surgery. For every woman who has decided on breast augmentation surgery (Augmentation Mammoplasty), the famous question echoing in her mind is: “Teardrop or round implant?” This choice is not just a simple shape preference; it is a surgical fusion of your body proportions, chest wall structure, lifestyle, and that “ideal” image you have dreamed of.

At Forever Clinica, during the operations we perform in the heart of Istanbul, we see one thing very clearly: the best implant is not the “biggest” one, but the one that is most compatible with your body’s architecture and completes you both physically and mentally. While some women want a prominent cleavage with a feminine “push-up” effect in the upper pole (the upper part of the breast), others prefer a form that looks completely natural from the outside, exhibiting a natural drooping tendency that does not give away the fact that they had surgery. Let’s examine these two popular implant types, which one is the right key for your body type, and the unique advantages offered by anatomical implants in all their professional detail.


Breast Augmentation

Round Implants: Fullness and Aesthetic Splendor

Round implants are the most preferred and well-known type of implant in the aesthetic world. As the name suggests, they are shaped like a perfect hemisphere. Because they have a symmetrical structure, they provide an equal amount of volume to both the upper and lower parts of the breast. This makes these implants indispensable for women who want to create a significant difference, especially in the cleavage area.

Key Advantages of Round Implants

The greatest advantage offered by round implants is “upper pole fullness.” In a natural breast structure, the upper part is usually emptier; however, round implants fill this gap, ensuring the breast looks voluminous from every angle. Especially when wearing a bra or swimwear, it creates a self-acting “push-up” effect, bringing the cleavage to the fore.

Another critical advantage is the absence of “rotation risk.” Implants can rotate around their own axis over time inside the body. Since round implants are symmetrical from every direction, even if they rotate, no aesthetic distortion or asymmetry occurs in the shape of the breast. This provides great security in terms of long-term aesthetic results. Furthermore, round implants are highly successful in making the breast appear more upright and voluminous; their projection (outward protrusion) values are generally higher.

Who are Round Implants Suitable For?

If your breast tissue has emptied from the upper part (especially after breastfeeding or rapid weight loss), if you want a more assertive and prominent cleavage appearance, and if your chest wall structure is suitable to carry this volume, round implants are the ideal choice for you. They provide excellent results in young patients or in those who already have sufficient breast tissue and only want an increase in volume.


Teardrop (Anatomical) Implants: Engineering at the Peak of Naturalness

Anatomical implants are designed to mimic the biological structure of the breast exactly. The upper part is thinner and flatter, while the lower part is fuller and wider; just like the natural “teardrop” shape a real breast takes with gravity. This is why they are called “anatomical” in the aesthetic world.

Advantages of Teardrop Implants and the Naturalness Factor

The greatest promise of teardrop implants is a “soft and natural transition.” It provides a gradual increase in volume from the top of the breast to the bottom. When viewed from the outside, it does not create the feeling that “there is a surgical intervention here”; on the contrary, it creates an illusion as if it were the person’s own natural tissue. These implants move the position of the nipple upward with a more natural projection and ensure that the aesthetic curve (inframammary fold) at the bottom of the breast looks perfect.

For those who want a natural appearance, the advantages of anatomical implants are endless. Especially in very thin patients whose ribcage bones are prominent or whose breast tissue is “near zero,” it prevents the upper edges of the implant from becoming visible under the skin (rippling). By providing internal support to the breast, it increases the fullness in the lower part of the breast and mimics the aesthetic sagging form created by gravity.

Who Should Prefer Teardrop Implants?

Teardrop implants are the gold standard for those with very little existing breast tissue, those who say “I don’t want it to be obvious that I had surgery, but I want my form to be perfected,” and athletic or thin women who do not want to compromise on a natural look. They are also frequently preferred to balance the form in patients with slight asymmetry in the chest wall.


Implant Selection by Body Type: Which Parameters are Important for You?

Choosing an implant is not just about picking a shape from a catalog; it is an engineering and design process. Forever Clinica experts meticulously analyze these three fundamental physical elements when determining the most suitable one for you:

1. Chest Wall Width and Chest Wall Structure If you have a narrow chest wall, a round implant with a very wide base can overflow from the sides or create an uncomfortable width toward the armpit. In this case, anatomical models with a narrower base but high forward protrusion (projection) should be selected. In women with wide shoulders and a wide ribcage, round implants balance the body silhouette much better.

2. Quality and Quantity of Existing Breast Tissue If you have enough of your own breast tissue, even when a round implant is placed, the natural tissue on top softens this volume and the result still looks natural. However, if the breast tissue is very thin, the upper boundary of a round implant may be visible under the skin like a step. In these cases, the teardrop implant eliminates that “step” appearance and offers a smooth transition.

3. Skin Elasticity and the “Pinch Test” How flexible your skin is determines how natural the implant will look. During the examination, your surgeon measures your tissue thickness by performing a “pinch test.” If the tissue is very thin, a combination of submuscular (under the muscle) placement and a teardrop implant is generally the safest and most aesthetic way.


Surgical Techniques: Submuscular or Subglandular?

The location where the implant is placed affects the result as much as the shape of the implant itself. At Forever Clinica, we choose one of these two methods according to the patient’s anatomy:

  • Submuscular Placement: The implant is placed behind the chest muscle (pectoralis major). This method prevents the edges of the implant from being visible and provides a more natural softness. It also minimizes the risk of capsular contracture.

  • Subglandular Placement: The implant is placed immediately behind the breast tissue, in front of the muscle. The recovery process is faster and may sometimes be preferred for athletes. However, if the skin thickness is not sufficient, the implant may be noticeable.

  • Dual Plane Technique: In this method, which is considered the “gold standard” today, the upper part of the implant remains under the muscle, while the lower part remains under the breast tissue. In this way, the natural transition in the upper pole is preserved, and the desired fullness in the lower part is achieved.


Digital Planning and 3D Simulation: See the Result Before the Surgery

The greatest comfort offered by technology is the elimination of uncertainties. Thanks to the advanced technology digital analyses and 3D simulation software we use at Forever Clinica, you can see how a teardrop implant will look on your body or how a round implant will change your cleavage line before you even lie on the operating table.

These simulations, performed over your own photographs, end your anxieties such as “I wonder if it will be too big?” or “Will it look natural?” By trying implant sizes and shapes in a digital environment with your surgeon, you reach a common aesthetic decision. This is the most important step that brings the post-operative happiness rate close to 100%.


An Aesthetic Renewal in Istanbul: Why Forever Clinica?

Every year, thousands of women from all over the world choose Istanbul, Turkey for breast aesthetics. Istanbul is not just a health tourism destination in this field; it is a global center of surgical mastery, advanced technology, and hospitality.

At Forever Clinica, we design this process as a “renewal vacation.” We plan every detail for you, from your VIP transfers to your luxury accommodation and the nursing support that is by your side 24/7 after the operation. While you achieve your new form in the fascinating atmosphere of Istanbul, you experience the peace of knowing that a professional team is behind you at every moment. The case diversity and manual dexterity of Turkish surgeons are your greatest guarantee in reaching that perfect result you dream of.


Frequently Asked Questions (FAQ)

1. Does a teardrop implant rotate inside the body? There is a theoretical risk of rotation for anatomical implants, and if they rotate, the shape of the breast may be distorted. However, modern textured implants grip the surrounding tissue firmly, minimizing this risk. The surgeon preparing the pocket (the implant housing) to its exact size brings this risk close to zero.

2. Do implants prevent breastfeeding? Absolutely not. Since implants are placed under the muscle or behind the breast tissue, they do not damage the milk ducts and glands. You can breastfeed healthily after the surgery.

3. Where is the surgical scar located and how long does it last? Usually, a hidden scar of about 3-4 cm remains in the inframammary fold (the crease under the breast). Since this scar remains in the natural fold line of the breast, it is invisible when viewed from the outside. Over time, it turns to your skin color and becomes indistinct.

4. What is the lifespan of the implants? Modern silicone implants are produced with a “lifetime” usage guarantee. They do not need to be replaced unless a rupture, leak, or serious form distortion occurs.

5. When can I exercise after the surgery? You can start light walks from the 3rd day. However, it is generally recommended to wait 6 weeks for heavy sports, arm exercises, and swimming.


Conclusion: Your Self-Confidence is in Your Hands

Breast augmentation surgery is not just a physical change; it is a step taken for you to feel freer, more feminine, and happier. Whether you choose the assertive cleavage of a round implant or the fascinating naturalness of a teardrop implant, the important thing is that you complete this journey in expert hands, feeling safe.

As the Forever Clinica family, we are waiting for you in the heart of Istanbul with our most advanced digital technologies and surgical expertise. Your new reflection in the mirror will be the source of your most beautiful smile for the rest of your life.


ℹ️ Results may vary from person to person for every surgical or interventional procedure. It is recommended that you obtain detailed information from your physician before the procedure.

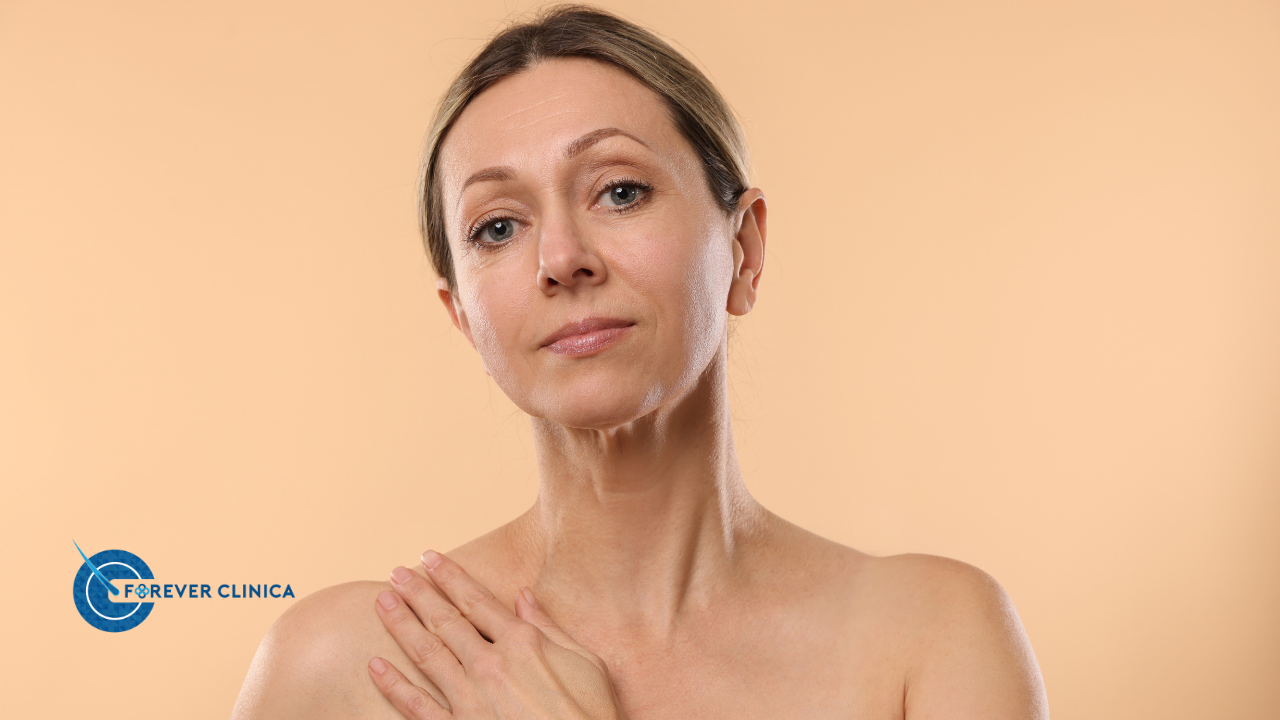
What is Neck Lift Surgery?

Time often leaves its most honest marks on the neck. No matter how meticulously you care for your face or how many high-quality creams you apply, gravity and the natural aging process eventually affect the thin skin and muscle structure of the neck. It can be disheartening to look in the mirror and see a blurred jawline, sagging often referred to as a “turkey neck,” or deep horizontal creases settling in. This is where the most effective solution to turn back the clock and restore that sharp, youthful definition to the lower face comes into play: Neck Lift Surgery (Lower Rhytidectomy).

At Forever Clinica, during the aesthetic operations we facilitate in the heart of Istanbul, we understand that a neck lift is not just a “stretching” procedure; it is an architectural reconstruction of the lower face. The neck is the most vital pillar that allows the face to appear as an aesthetic whole. Let’s examine this miraculous touch of modern medicine—the surgical process, technical details, and recovery stages—from a professional and comprehensive perspective.


Neck Lift Surgery

What is Neck Lift Surgery? A Process of Aesthetic Restoration

A neck lift is a surgical procedure aimed at removing excess skin, tightening the underlying weakened muscles, and, if necessary, eliminating stubborn fat deposits (the double chin). In medical literature, it is generally defined as a combination of Platysmaplasty (muscle repair) and Cervicoplasty (skin repair).

This operation does more than just erase the signs of aging; it also creates a much more dynamic profile for younger patients who may have a genetically sagging or fatty neck area by defining the jawline. Much like reinforcing the foundation of a building, a neck lift prepares a solid and taut ground for the lower portion of the face.


Why Does the Neck Age? Getting to the Root of the Problem

The skin in the neck area is much thinner and more delicate than in other parts of the body. Furthermore, because it is poor in sebaceous (oil) glands, it is more prone to drying and wrinkling. The aging process manifests in the neck in three primary ways:

  • Skin Laxity: With the decrease of collagen and elastin fibers, the skin loses its elasticity, becoming “crepe-like” and sagging.

  • Muscle Weakening (Platysma Bands): The “platysma” muscle, which extends upward on both sides of the neck, weakens and separates over time. This leads to the formation of vertical cords or bands in the neck.

  • Fat Accumulation (The Double Chin): Stubborn fat tissue accumulating under the chin hides the sharp jawline, making the person look heavier and older than they actually are.


Who is an Ideal Candidate for a Neck Lift?

The ideal candidate for a neck lift is an individual in good general health who is bothered by physical changes in the neck area. Generally, people with the following criteria apply for this surgery:

  • Those whose jawline has completely disappeared, making the face and neck appear merged.

  • Individuals with advanced sagging and wrinkling in the neck skin.

  • People with a stubborn “double chin” that does not go away despite diet and exercise.

  • Individuals whose vertical “platysma bands” have become very prominent.

  • Those who have tried non-surgical methods (thread lifts, focused ultrasound, etc.) but did not achieve the desired results.

While the surgery is usually performed on patients between the ages of 40 and 70, it also yields excellent results for patients in their 30s who experience sagging due to genetic reasons.


The Surgical Process and Techniques Used

Neck lift surgery can involve several different techniques customized to the patient’s needs. The operation is typically performed under general anesthesia and lasts between 2 to 4 hours, depending on the complexity.

1. Liposuction (Fat Removal): If the primary problem is only fat accumulation, excess fat is vacuumed out through millimetric incisions made behind the ears or under the chin. If skin elasticity is good in younger patients, liposuction alone may suffice.

2. Cervicoplasty (Skin Tightening): Discreet incisions are made starting in front of the ear, extending behind the ear and into the hairline. Through these incisions, the skin is gently pulled upward and backward. The excess skin is then trimmed and removed.

3. Platysmaplasty (Muscle Tightening): A small incision under the chin allows access to the neck muscles. The weakened platysma muscles are sutured together in the midline, much like a corset. This is the part of the surgery that provides the most long-lasting result because the internal “support system” is reinforced.


Neck Lift vs. Face Lift: A Holistic Aesthetic Approach

Many of our patients wonder about the difference between a neck lift and a face lift. Since the neck is an extension of the face, these two procedures often complement each other.

  • If the problem is isolated to the area under the chin and the neck, a neck lift alone is sufficient.

  • However, if sagging in the cheeks and “jowls” (sagging skin at the jawline) are also present, the best result is achieved by combining face and neck lift surgery.

Forever Clinica experts evaluate your face as a whole during the consultation and recommend the combination that will give you the most natural and youthful appearance. Our goal is not to make you “someone else,” but to return you to the “best version of yourself.”


The Recovery Process: Step-by-Step Renewal

A neck lift is a significant surgical procedure, and the body needs time to recover. The recovery process generally unfolds as follows:

  • The First 24-48 Hours: You are usually asked to stay in the hospital for one night after the surgery. There will be a compression bandage around your neck. Mild discomfort is expected and easily controlled with pain medication.

  • The First Week: This is the period when swelling and bruising are most intense. During this time, you should keep your head as upright as possible and avoid sudden movements. On the 5th or 7th day, your stitches are removed (if non-dissolvable sutures were used).

  • The Second Week: Bruising largely fades, and you can gradually return to social life and desk work. The feeling of tension in the neck area may continue.

  • The First Month and Beyond: 80% of the edema has subsided. Surgical scars begin to turn from a pink line to your natural skin tone. It is usually recommended to wait until the 6th week before returning to heavy sports and swimming.


Aesthetic Transformation in Istanbul: Why Forever Clinica?

Every year, thousands of guests from all over the world, especially from Europe and the Middle East, choose Istanbul, Turkey for plastic surgery. Istanbul is not just a city in this field; it is a global center of excellence.

At Forever Clinica, we combine this global experience with boutique and privileged service. Why should you choose us?

  1. Surgical Mastery: A neck lift is an operation that requires millimetric precision. Our surgeons are experts at hiding suture lines in the most invisible spots, backed by the experience of thousands of cases.

  2. Digital Planning: We share the expected result with our patients using 3D simulations before the operation.

  3. VIP Comfort: We plan every detail for you, from being met at the airport to luxury accommodation and 24/7 nursing support after the operation.

  4. International Trust: While you regain your health in Istanbul, you experience the peace of knowing that a professional team is with you at every moment.


Frequently Asked Questions (FAQ)

1. Is neck lift surgery permanent? The surgery turns back the clock by about 10-15 years. The aging process does not stop, but you will always have a much firmer and younger neck structure than your peers.

2. Will there be a surgical scar? Since incisions are hidden behind the ears and in the hairline, they become invisible to the naked eye once healing is complete.

3. Is there a lot of pain after the surgery? Contrary to popular belief, a neck lift is not a painful surgery. There is more of a feeling of “tension” and “numbness,” which fades over time.

4. Can the same result be achieved with non-surgical methods? In patients with advanced sagging and muscle laxity, no non-surgical method can provide the sharp and permanent result that surgery offers. Non-surgical methods are mostly for early-stage cases.

5. When can I fly back home? Our international patients can usually fly safely 7-8 days after the surgery.


Conclusion: Give Yourself a Gift

The neck is the most honest area that reveals your age. However, thanks to modern aesthetic surgery, this “honesty” is now under your control. With a neck lift surgery, you don’t just get rid of sagging skin; you regain the self-confidence you feel every time you look in the mirror.

As the Forever Clinica family, we invite you to this transformation in the heart of Istanbul. A young, firm, and smooth neck line is not a dream; it is just one decision away.


ℹ️ Results may vary from person to person for every surgical or interventional procedure. It is recommended that you obtain detailed information from your physician before the procedure.

Nutrition After Bariatric Surgery: Rules for the First Month

Your bariatric surgery has been successfully completed, and you have now stepped into the most exciting transformation process of your life. However, you must remember one thing: surgery provides you with a perfect “tool” to lose weight; what determines how this tool is used is your nutritional habits. Your new stomach is now as small as a coffee cup and quite sensitive. You should think of it like a baby’s stomach and train it step by step.

At Forever Clinica, during the operations we facilitate in the heart of Istanbul, the issue we value most is that our patients get through this first month consciously and healthily. This period is not just a weight loss period, but a period of adapting to the new anatomy of your body. Let’s examine the critical turns of the first 30 days and the obstacles to be considered, such as “Dumping Syndrome,” together.


Nutrition After Bariatric Surgery

The First Step: The Liquid Phase (Weeks 1 and 2)

The first 14 days after surgery is the most sensitive period when your stitches heal and your stomach sheds its edema. During this period, only liquid foods can enter your stomach. This phase is crucial for preventing any strain on the staple line and ensuring that your body stays hydrated while recovering from the surgical intervention.

Critical Rules of the Liquid Phase:

  • Clear Liquids First: For the first few days, you begin only with clear liquids such as water, grainless meat/chicken broth, and unsweetened light tea. If you can see through it, it is generally safe.

  • The Transition to Full Liquids: After the initial clear liquid stage, you can introduce low-fat milk, soy milk, or thinned yogurt. Everything must be completely strained.

  • Protein Support: Since your stomach is small, it is impossible for you to get enough protein from foods alone. Therefore, you should drink the isolated protein powders recommended by your doctor by mixing them into your liquids. Protein is the building block of healing.

  • Drink Sip by Sip: Never chug a glass of water or protein shake. Finishing a glass of liquid should take you about 30–45 minutes. Taking large gulps can cause painful spasms in your new small pouch.

  • Straws are Forbidden: Drinking with a straw causes air to enter the stomach, leading to severe gas pains and discomfort. Always sip directly from a cup.


The Transition Phase: The Purée Period (Weeks 3 and 4)

Your stitches have knitted together, and your stomach can now accept slightly more voluminous liquids. From the 15th day onwards, a transition is made to puréed foods. This is an exciting time because you finally get to experience different flavors and textures, but caution is still required.

What to Eat During the Purée Phase?

  • Blended and strained vegetable soups (avoiding fibrous vegetables for now).

  • Boiled eggs mashed thoroughly with a fork until they reach a paste-like consistency.

  • Low-fat labneh or strained (Greek) yogurt.

  • Puréed fish or chicken (softened with vegetable broth or a little water to ensure it isn’t dry).

  • Soft, mashed fruits like bananas or unsweetened applesauce.

Important Considerations:

  • Foods must be in the consistency of “baby food.” There should be no lumps or hard pieces left in the food. If you can’t mash it with a fork, it belongs in the blender.

  • Each meal should be approximately 2–3 tablespoons in quantity. Stop the moment you feel a sense of fullness or a slight pressure in your chest. Overeating at this stage can stretch the pouch and cause vomiting.


What is Dumping Syndrome and How to Prevent It?

One of the issues that patients who have undergone bariatric surgery, especially those in the Bypass group, are most afraid of is Dumping Syndrome. Even though it is less common in sleeve gastrectomy, it can still occur if nutritional rules are ignored.

What is it? It is a condition where, due to the bypass or reduction of a part of the stomach, especially sugary and carbohydrate-rich foods “dump” very quickly into the small intestine. The body gives a sudden and often violent reaction to this rapid sugar entry.

What are the Symptoms?

  • Severe abdominal cramps and diarrhea starting immediately after a meal.

  • Palpitations (rapid heart rate) and dizziness.

  • Cold sweating and nausea.

  • A feeling of a sudden drop in blood pressure or a “near-fainting” sensation.

How to Prevent It?

  1. Stay Away from Sugar: Refined sugar and sugary foods are the number one cause of Dumping Syndrome. This includes sodas, candies, and even some high-sugar fruit juices.

  2. The 30-Minute Rule (Solid-Liquid Separation): Do not drink water while eating. Liquid consumption should be 30 minutes before or 30 minutes after a meal. Liquid taken with food causes the food to be pushed into the intestine rapidly.

  3. Small Bites, Thorough Chewing: Even in the purée and later soft-solid phases, reduce your bites to the size of a hazelnut and chew at least 20–30 times. This allows the food to mix with saliva and start the digestion process before reaching the stomach.


5 Golden Rules for the First Month

  1. Listen to the Satiety Signal: It takes 20 minutes for the satiety signal to reach your brain. Eat very slowly and push the plate aside at the first feeling of fullness. If you feel a “hiccup” or a slight pressure, you’ve already had one bite too many.

  2. Hydration is Key: Aim to drink at least 1.5 liters of water a day, but do this by spreading it throughout the day. Dehydration is one of the most common reasons for post-op hospital readmissions.

  3. Avoid Caffeine and Carbonation: For the first month, coffee, carbonated drinks (soda), and alcohol can cause severe irritation to your stomach lining and can lead to ulcers or stretching.

  4. Protein Priority: On your plate (or in your bowl), there should always be protein first (yogurt, egg, meat purée), then vegetables. Protein is essential for maintaining muscle mass while you lose fat.

  5. Do Not Neglect Your Vitamins: Since the stomach volume has shrunk and absorption has changed slightly, regular vitamin and mineral support is vital. Discipline in the first month sets the tone for your lifelong vitamin journey.


A Healthy Future in Istanbul: Why Forever Clinica?

Bariatric surgery does not only consist of the operating table. The Istanbul, Turkey route is a world leader with the high surgical experience and post-op (post-operative) follow-up systems it offers. At Forever Clinica, we understand that surgery is only 20% of the process; the remaining 80% is the support and lifestyle change.

We do not leave our patients alone after they are discharged from the hospital. Our expert dietitians guide you through every step of the first month. While starting your new life in the fascinating atmosphere of Istanbul, knowing that a professional team is with you 24/7 is the key to your success. Our international coordinators ensure that you have access to medical advice in your own language, making the recovery process as smooth as possible.


Frequently Asked Questions (FAQ)

1. When can I start eating normal food? Generally, a gradual transition to soft solid foods is made at the end of the 1st month. However, every body is different; you should wait for your doctor’s and dietitian’s approval.

2. I have a lot of gas pain after the surgery, what should I do? The best medicine for this is walking. Frequent walks at home or in the hospital corridor help to expel the gas used during the laparoscopic procedure.

3. I don’t feel any hunger at all, do I still have to eat? Yes. Even if you don’t feel hungry, you should eat protein-heavy meals on a schedule so that your body can heal and you don’t experience muscle loss. Think of it as “fueling” your recovery.

4. Is Dumping Syndrome dangerous? It is generally not life-threatening, but it is quite uncomfortable and scary for the person experiencing it. Experiencing these symptoms is your body’s way of saying “you ate something wrong.” It serves as a strong biological deterrent against unhealthy foods.

5. How much weight will I lose in the first month? Most patients lose between 10% and 15% of their excess body weight in the first month. However, remember that everyone’s journey is unique. Do not compare your scale numbers with others; focus on your own healing and habit-building.


ℹ️ Results may vary from person to person for every surgical or interventional procedure. It is recommended that you obtain detailed information from your physician before the procedure.

How is a Hollywood Smile Design done?

Smiling is the only language in the world that requires no translation. However, sometimes the reflection in the mirror doesn’t quite match the energy in your soul. Perhaps you are unhappy with the color of your teeth, or maybe their irregular shape prevents you from laughing freely. This is where the most prestigious intersection of modern dentistry and aesthetics comes into play: Hollywood Smile Design.

A Hollywood Smile is not just a teeth-whitening process. It is the reconstruction of your dental structure—much like a bespoke suit—designed to harmonize perfectly with your facial geometry, personality, and skin tone. At Forever Clinica, during the designs we facilitate in the heart of Istanbul, we have seen one undeniable truth: a proper smile design doesn’t just change your teeth; it transforms your entire countenance and self-confidence. Let’s explore this fascinating process where digital technology meets art, from the rules of the “Golden Ratio” to the digital mock-up.


Hollywood Smile

What is Hollywood Smile Design? A Smile as an Art Form

Smile design is the planning of the relationship between the teeth, gums, and lips to meet a patient’s aesthetic and functional needs. Named after the flawless, bright, and symmetrical smiles of Hollywood stars, this application has become an accessible luxury for everyone today, thanks to digital dentistry.

In this design, the goal is not just to obtain “white teeth” but to create a structure that best suits the person’s facial features, looks natural, and preserves functional chewing capacity. The design process requires as much meticulous preparation as an architect drawing a building or a painter working on a portrait.


Personalized Design Parameters: Your Smile, Your Rules

The biggest difference that distinguishes Hollywood Smile from “ordinary dental treatment” is the personalization of the design. No two people have the same facial features; therefore, making the same shape of teeth for everyone would be an aesthetic error. During the design process, the tooth form is determined according to these four main parameters:

1. Tooth Form According to Face Shape

The length, width, and angle of the corners of the teeth should balance your facial character by creating a contrast or harmony with your face shape.

  • Oval Face Shape: Generally considered the most balanced face shape. While almost any tooth form suits this face type, slightly curved and cornerless tooth forms are preferred to maintain the soft lines of the face.

  • Square Face Shape: Characterized by a strong jawline and a wide forehead. To make a square face look softer and more feminine (or less harsh), the tooth corners need to have more rounded lines.

  • Round Face Shape: To make the face look thinner and longer, thinner and longer tooth forms are designed. Short and square teeth can make the face look even rounder.

  • Heart (Triangular) Face Shape: To balance the sharpness of the jawline, it is recommended that the upper tooth forms be neither too angular nor too curved, but in a middle-balanced form.

2. Lip Structure and the Smile Line

When designing a smile, the thickness of the lips, how much they lift during smiling, and the harmony of the “smile line” (the imaginary line connecting the edges of the upper teeth with the curve of the lower lip) are examined.

  • The Smile Line: The imaginary line connecting the incisal edges of the upper teeth should be parallel to the inner curve of the lower lip. This parallelism adds youth and dynamism to the smile.

  • Lip Support: The volume of the teeth can support the lips from the inside, making them appear fuller. Especially as one ages, fine lines around the lips can be minimized with a correct dental design.

3. Skin Tone and Tooth Whiteness Balance

While “stark white” teeth come to mind when thinking of a Hollywood Smile, the shade of this whiteness (Bleach tones) should be selected according to the person’s skin tone.

  • Fair-Skinned Individuals: Very bright and cold-toned whites (BL1, BL2) can look natural on these people.

  • Dark and Olive-Skinned Individuals: Extremely bright whites can look artificial. In this skin group, colors with slightly warm undertones but high brightness, which we call “natural whiteness,” provide a much more elegant result. The goal is not for the teeth to “scream” but to look like a part of you.

4. Pink Aesthetics (Gum Aesthetics)

A perfect smile is not just about teeth; the appearance of the gums, called “pink aesthetics,” is also vital. A “Gummy Smile” (where gums show too much when laughing) or asymmetries in gum levels are corrected in seconds with laser technology.


The Digital Smile Design (DSD) Process: See the Result Before the Start

The greatest comfort offered by technology is Digital Smile Design (DSD) software. Our patients no longer have to fear, “How will I look?” The process generally works as follows:

  1. Photography and 3D Scanning: High-resolution photos of the patient are taken, and a digital copy (model) of the teeth is created using intraoral scanners.

  2. Digital Simulation: The patient’s facial proportions are analyzed on special software. The length, width, and gum levels of the teeth are designed millimetrically in the digital environment.

  3. Mock-up (Prototype) Application: The design prepared digitally is converted into a temporary material via 3D printers and applied to the patient’s mouth. Before any permanent procedure is done, the patient sees a physical copy of their new smile in their own mouth, speaks, and looks in the mirror.

  4. Approval and Application: Once the patient approves the design, the porcelain laminate (veneers) or zirconium crown process begins.


Techniques Used: Laminates or Zirconium?

Different materials are used to achieve a Hollywood Smile. At Forever Clinica, we choose the right material based on the patient’s needs:

  • Porcelain Laminate (Veneers): These are leaf-thin porcelains bonded to the front surface of the tooth with very little (sometimes zero) abrasion. Their light transmittance is very high, providing the most natural result.

  • E-max Veneers: Aesthetic porcelains with glass-ceramic content and increased durability. They meet aesthetic expectations, especially in the front teeth, at the highest level.

  • Zirconium-Supported Porcelain: If there are large fillings or missing teeth, zirconium crowns, which are both durable and aesthetic, are preferred.


Smile Design in Istanbul: Why Turkey?

Every year, thousands of patients from all over the world, especially from Europe, the USA, and the Middle East, head to Istanbul, Turkey, for smile design. Why has Istanbul become a world brand in aesthetic dentistry?

  • Surgical and Aesthetic Experience: Turkish dentists are among the most experienced in the world due to the sheer diversity of cases.

  • Advanced Technology: Clinics in Istanbul use the most advanced digital scanning and design devices in the world.

  • Balance of Speed and Quality: Usually, a full Hollywood Smile design can be completed within 5 to 7 days (during a holiday).

  • Holistic Experience: At Forever Clinica, we plan this process not just as a treatment but as a transformational vacation. We offer VIP transfers, luxury accommodation, and a recovery period spent in the historical atmosphere of Istanbul.


Frequently Asked Questions (FAQ)

1. Will my teeth be filed down a lot for a Hollywood Smile? With modern techniques (especially for laminate veneers), only 0.3 to 0.7 mm of abrasion is made from your teeth. In some cases, with the “No-Prep” technique, a design can be made without touching the teeth at all.

2. How long is the treatment period? Including digital design and the laboratory phase of the porcelains, you can get your new smile in usually 5 to 7 days.

3. Will the new teeth turn yellow over time? Unlike natural tooth structure, the porcelain materials used (E-max or Zirconium) are not affected by external factors like tea, coffee, or smoking and do not change color.

4. Is smile design a painful procedure? No. You will not feel any pain during procedures performed under local anesthesia. Afterward, there may be slight sensitivity, but this disappears within a few days.

5. How long does a Hollywood Smile last? With proper oral care and regular check-ups, these designs can be used without problems for 15–20 years.


Conclusion: Don’t Leave Your Smile to Chance

Hollywood Smile Design is not just an aesthetic application; it is a promise you make to yourself. That smile, which makes you happy when you look in the mirror, refreshes your self-confidence, and reveals the full beauty of your face, is actually a digital work of art.

If you want to achieve the smile of your dreams with Forever Clinica’s expertise and the most advanced digital technologies in the unique atmosphere of Istanbul, we are here for you. Your smile is your greatest power to help you change the world. Entrust it to expert hands.


ℹ️ Results may vary from person to person for every surgical or interventional procedure. It is recommended that you obtain detailed information from your physician before the procedure.

Who is suitable for Gastric Sleeve (Stomach Reduction) Surgery?

Have you ever looked in the mirror every morning and felt that the person in the reflection isn’t truly you, but rather someone trapped under a heavy burden? Weight loss is more than just an aesthetic concern or an attempt to fit into certain clothes; it is a struggle to liberate your body. Diet lists, endless cardio sessions, miracle cures that claim to solve everything… If you have tried all of these and still feel stuck in that “vicious cycle,” it is time to talk about one of the most powerful tools modern medicine offers: Sleeve Gastrectomy (Gastric Sleeve) Surgery.

At Forever Clinica, in the heart of Istanbul, we see a clear reality every day while touching the lives of dozens of people: gastric sleeve surgery is not a destination, but the starting whistle for the second act of your life. However, before making this big decision, you need to understand whether this method is the right key for you. Who can pass through this door, for whom is this path closed, and how important is age really? Let’s examine the answers to these questions in detail under the light of science.


Gastric Sleeve

What is Sleeve Gastrectomy Surgery? (An Engineering Marvel)

Sleeve Gastrectomy, medically known as Sleeve Gastrectomy, is a surgical procedure in which approximately 80% of your stomach is removed. The remaining stomach is shaped roughly like a banana or a thin tube. However, this process does not just reduce the volume of the stomach; it also reprograms the hormonal balance in your body.

Ghrelin, known as the “hunger hormone” produced in the removed part of the stomach, drops to minimum levels after surgery. What does this mean? You no longer lose weight just because you eat less, but also because you feel less hungry. This is the greatest technological support given to you to win the war against your own willpower. It essentially resets your metabolic clock, allowing you to build a new relationship with food without the constant biological urge to overeat.


The Gold Standard: What is Body Mass Index (BMI)?

The first and most concrete data that determines whether a person is suitable for gastric sleeve surgery is the Body Mass Index (BMI). This calculation, accepted by the World Health Organization (WHO), is obtained by dividing your weight by the square of your height.

How to Calculate BMI?

The formula is: $BMI = \frac{\text{Weight (kg)}}{\text{Height (m)} \times \text{Height (m)}}$

For example, if you weigh 120 kg and are 1.70 m tall:

$1.70 \times 1.70 = 2.89$

$120 / 2.89 = 41.5$ (This value falls into the morbid obesity class.)

This number is the primary gatekeeper for bariatric surgery eligibility, but it is not the only factor. We look at your body as a whole system, considering your muscle mass, fat distribution, and metabolic health.


Who is Suitable for Sleeve Gastrectomy Surgery?

Can every overweight individual have gastric sleeve surgery? Of course not. This is a surgical intervention and certain criteria must be met. According to international surgical guidelines, the requirements for candidacy are as follows:

1. Those with a BMI of 40 and Above (Morbid Obesity)

If your BMI is over 40, you are considered a candidate for gastric sleeve surgery regardless of whether you have an additional disease. This is because obesity at this level is a serious health problem that shortens life expectancy on its own. It puts immense pressure on your heart, lungs, and joints every single second.

2. Those with a BMI Between 35 – 40 and with Comorbidities

Even if your BMI is not 40, surgery is recommended if you have co-morbidities that make your life difficult due to obesity. These diseases include:

  • Type 2 Diabetes (Sugar Disease)

  • Hypertension (High Blood Pressure)

  • Sleep Apnea (Cessation of breathing during sleep)

  • Serious Joint Problems

  • Fatty Liver Disease

  • High Cholesterol levels that cannot be controlled by medication

3. People Who Have Tried Other Methods to Lose Weight and Failed

Surgery should always be considered a final step. If you have not been able to achieve permanent weight loss despite dieting and exercising under expert supervision for at least 6 months, surgical options are put on the table. We look for patients who are committed to making a permanent change but need a biological “boost” to get there.


Who Cannot Have Sleeve Gastrectomy Surgery? (Critical Barriers)

As with any medical operation, there are some “absolute no” (contraindication) situations for gastric sleeve surgery. At Forever Clinica, we keep safety above everything else. Surgery is not planned in the following cases:

  • Untreated Psychiatric Illnesses: It may be impossible to manage the post-operative process in individuals with severe depression, schizophrenia, or personality disorders.

  • Eating Disorders (such as Bulimia): If the person has a psychological problem where they cannot control their eating urge, surgery may offer a physical solution but result in mental failure.

  • Substance and Alcohol Addiction: Alcohol and substance use both increase surgical risks and lead to absorption problems after surgery.

  • Serious Health Problems Preventing Anesthesia: Patients whose heart or lung capacity is too low to handle general anesthesia.

  • Those Planning Pregnancy in the Near Future: Pregnancy is not recommended for at least 1-1.5 years after surgery for the body to settle into balance.


Age Limits: What is the Situation for Young People and the Elderly?

The traditional age limit for surgery is usually between 18 and 65. However, modern medicine can stretch these limits within the framework of “biological age” and “need.”

  • Minors (Under 18): If childhood obesity is stopping the child’s development and seriously threatening their health, this surgery can be performed from the age of 15 with the approval of a special board (pediatrician, psychologist, surgeon).

  • Over 65 Years Old: Being advanced in age is not an obstacle to surgery; however, the patient’s heart, lungs, and general condition are examined much more meticulously. If the benefit of the surgery (for example, ending joint pain) exceeds the surgical risks, the operation is performed.


A Life Transformation in Istanbul: Why Forever Clinica?

Obesity surgery is not just about cutting and removing the stomach; it is a process of follow-up and support that starts from that moment. Istanbul, Turkey, has become one of the most reliable and experienced centers in the world for obesity surgery. But why?

First, clinical experience. Our surgeons in Istanbul see ten times as many cases as their colleagues in Europe or America, bringing their hand skills to the top. At Forever Clinica, we combine this experience with VIP comfort. Private transfers from the airport, luxury accommodation, and most importantly; the support of a dietitian and coordinator who is with you even after you leave the hospital.

Getting your health back in the fascinating atmosphere of Istanbul is not just a medical procedure; it is a spiritual refreshment. While taking the first steps of your new life in the cool breeze of the Bosphorus, you experience the peace of knowing that a professional team is behind you 24/7.


Pre-Operative Preparation Process: What Awaits You?

After the decision for surgery is made, you go through a series of “check-up” processes in our clinic. This process is to bring the safety of the surgery to a level close to 100%:

  1. Blood Tests: Your hormonal status and vitamin levels are checked.

  2. Endoscopy: The inside of the stomach is examined; it is checked whether there is a wound, polyp, or a condition that prevents surgery.

  3. Cardiology and Chest Diseases Examination: It is confirmed whether your heart and lungs are ready for the operation.

  4. Psychologist and Dietitian Interview: Are you mentally ready for your new life?


Frequently Asked Questions (FAQ)

1. Is weight regained after gastric sleeve surgery?

Gastric sleeve surgery opens a huge door for you to lose weight. However, it is up to you to walk through this door and build a new lifestyle. If you return to your old eating habits (high-calorie liquids, constant snacking, etc.), your stomach may expand a bit over time and weight gain may occur. However, 90% of our patients achieve permanent success.

2. Will there be a surgical scar?

The operation is performed with the laparoscopic (closed) method. It is done through 4-5 small holes in the abdominal area ranging between 0.5 and 1 cm. These scars disappear almost completely over time.

3. How long will the liquid diet last after the surgery?

There is a liquid period for the first 15 days and a puree period for the next 15 days. At the end of the 1st month, solid foods are gradually introduced.

4. Will there be sagging?

Due to rapid weight loss, sagging may be seen depending on the elasticity of the skin. However, this situation can be minimized with the right sports and protein supplements. If necessary, aesthetic touches can be made 1.5 – 2 years after the operation.

5. Do I have to use vitamins?

Since the stomach shrinks and absorption changes slightly, regular vitamin and mineral support is vital, especially in the first year.


Conclusion: The Choice is Yours, the Path is Ours

Obesity is not a fate. Every moment you say “I can’t lose weight” is actually a moment when you haven’t found the right key yet. Gastric sleeve surgery is one of the biggest investments you can make for your health. With this surgery, you don’t just get rid of your weight; you also get rid of your blood pressure medications, your sugar injections, and the sleep apnea that takes your breath away at night.

“Bariatric surgery is not just an intervention on the body; it is a gift of freedom to the soul.”

At Forever Clinica, we are here to be with you every step of the way in the heart of Istanbul. Are you ready to take a step for a new life, a healthier body, and that happy reflection in the mirror?


ℹ️ Results may vary from person to person for every surgical or interventional procedure. It is recommended that you obtain detailed information from your physician before the procedure.

First 10 Days After Hair Transplantation: Washing and Shedding of Scabs

Looking in the mirror and seeing your new hairline for the first time feels like turning a brand-new page in your life. The operation is over, and you’ve made it through the most technical part; however, you are now entering the most critical phase where those precious roots (grafts) need to anchor themselves firmly and the scabs need to shed healthily. The first 10 days after a hair transplant is a “golden window” that determines the future of your hair.

At Forever Clinica, we treat every transplant performed in the heart of Istanbul as a masterpiece entrusted to the patient. Protecting this trust requires patience and the right care techniques. Let’s examine this sensitive 10-day journey day by day, rule by rule, with the depth and detail your new investment deserves.


First 10 Days After Hair Transplantation

The First Three Days: The Biological Anchor

The first 72 hours following the operation is the period when the grafts are biologically trying to “anchor” themselves into the new channels where they were transplanted. During this time, the follicles are as delicate as a newborn. They aren’t fully connected to your blood circulation yet; they are simply surviving on the fluids from the surrounding tissues.

Many of our patients ask, “What happens if I just touch my head?” Think of it this way: you’ve just planted a new sapling in the soil and given it its first water. If you constantly shake that sapling or move it from its place, the roots will never take hold and it will eventually dry out. Your grafts are in the exact same situation. For the first three days, touching the transplanted area is strictly forbidden. Scratching, poking, or even accidentally bumping it can cause the grafts to pop out.

“The success of a hair transplant is 50% surgical skill and 50% the patient’s meticulous care during the first 10 days. A single graft moving out of place means that specific spot may never grow hair again.”

While we sleep, we might unconsciously move our hands to our heads or rub against the pillow. To reduce this risk to zero, using the neck pillow we recommend is not just a suggestion—it is a necessity. Sleeping on your back at a 45-degree angle both reduces the edema (swelling) that may occur on your face and protects the transplanted area from pillow contact. While you are staying in the historical atmosphere of Istanbul, remember that these small details create big differences.


The Art of Washing: Professional Touch and the First Contact

Approximately 48 hours after the operation, usually on the 2nd or 3rd day, the famous “first wash” day arrives. If you are in Istanbul, we prefer to perform this first wash with our professional teams at Forever Clinica. This is not just a cleaning; it is a training session where we teach you the care you will perform at home.

When you transition to the home washing process, you must act like a “wound care specialist.” What you need is the special lotion we provided, the clinical shampoo, and a good amount of patience.

Lotion Application and the Softening Process: You must apply the softening lotion to the transplanted area by “dabbing” it with your fingertips. You should never rub or friction the area. The purpose of the lotion is to soften the dried blood and tissue fluids, namely the scabs, formed after the operation. Waiting for 30–45 minutes after applying the lotion allows the scabs to soften thoroughly. This waiting period is the most important part of the wash.

The Intricacies of Rinsing: The water you use to clean off the lotion should be neither too hot nor too cold. Lukewarm water is ideal. However, the most critical point is the water pressure. Pressurized water coming directly from the showerhead can act like a sledgehammer on your roots. You should either pour the water gently using a bowl or keep the showerhead at a very low pressure from a distance.

Shampooing and Drying: Do not pour the shampoo directly onto your scalp and try to lather it there. Lather it in your hands first and apply this foam to the transplanted area using the “pat-dry” (dab and lift) technique. Never move your fingers in a horizontal rubbing motion. When drying, the harsh fibers of classic towels can snag and pull out the grafts. Use a paper towel instead; just press it down lightly to absorb the moisture or let your hair dry naturally at room temperature.


Days 4 to 7: The Itch and the Test of Patience

You will feel much more refreshed after the first wash. However, around the 4th day, a new guest might knock on your door: itching. This itch is actually good news; it shows that your skin is healing and the nerve endings are repairing themselves. But at this point, your patience will face its biggest test.

Nailing or scratching the transplanted area can lead to permanent loss of those roots and a risk of infection. To alleviate the itch, you can use the moisturizing sprays we gave you or, with your doctor’s approval, apply a cold compress to the forehead or donor area (not directly on the grafts). The cool air of Istanbul can sometimes help with this, but you must remember to protect the transplanted area from direct harsh wind and sunlight.

“A healing tissue itches, but the winners are those who do not scratch. Patience is as much a part of a hair transplant as the surgery itself.”

During this period, your overall body health also affects the survival rate of your grafts. Drinking plenty of water helps your skin maintain its moisture balance and flush out toxins. Additionally, staying away from smoking and alcohol increases the amount of oxygen in your blood, allowing the roots to be better nourished. At Forever Clinica, we recommend paying attention to your nutrition during this first week, focusing on protein and vitamin-rich foods.


Days 8 to 10: The Scab Shedding Marathon

And we have reached the finale of the 10-day process. From the 7th or 8th day onwards, those small dots in the transplant area—the scabs—become very prominent. These scabs are actually healing wound sites. However, the goal is for these scabs to be completely shed by the 10th day. Why? Because if the scabs stay there too long, they can prevent the scalp from breathing and make it difficult for the new hair shafts to emerge.

How Will We Shed the Scabs? From the 8th day, we make a small change in your washing routine. We no longer just “dab and lift”; we start circular massages with the fleshy part of your fingertips using very light pressure. The scabs, which have been thoroughly softened by the lotion, will begin to fall off one by one with this massage.

If you still have heavy scabbing by the 10th day, it means you need to slightly increase the pressure during washing. Don’t be afraid; by the 10th day, the grafts are firmly in place and will not come out with a gentle massage. Seeing those tiny, stiff hair shafts emerging from under the shed scabs will be the greatest reward for your 10 days of effort.


Golden Rules for Graft Survival

A hair transplant is not just a procedure; it is an investment. To protect this investment, you must etch these “golden prohibitions” into your mind for the first 10 days:

  1. Sunlight: Direct sunlight can damage the healing tissue. Wear the wide-brimmed hat we provided when going outside.

  2. Sweat and Exercise: Don’t rush back to the gym. Sweating can cause bacteria to form around the transplanted roots and lead to infection. You should wait at least one month for heavy exercises.

  3. Dusty and Dirty Environments: Construction sites, dusty streets, or smoky environments can harm the transplant area. Stay in sterile and clean environments as much as possible.

  4. Sexual Activity: Avoiding activities that increase blood pressure (including sexual intercourse) for the first 3–5 days post-op is recommended for the healthy attachment of the grafts.


Hair Transplant in Istanbul: Why Forever Clinica?

Why do tens of thousands of people from all over the world, especially from the UK, Germany, and the Middle East, choose Istanbul, Turkey for hair transplants? It’s not a coincidence. Turkey, and specifically Istanbul, is home to the world’s most experienced surgeons and the most advanced technologies in this field. At Forever Clinica, we are proud to be a part of this global success.

For us, the process doesn’t just end in the operating room. Beyond the VIP transfers and luxury accommodation we offer our international guests, we create the real difference in the “follow-up” process. During the critical first 10 days after the hair transplant, we monitor every washing step through the photos you send via WhatsApp and professionally supervise your scab-shedding process. We work to make you feel like both a tourist in the heart of Istanbul and a VIP receiving the highest level of medical service.


Frequently Asked Questions (FAQ)

1. Is it normal for hair shafts to come out with the scabs? Yes, this is perfectly normal. During the scab-shedding process, you might see some hair shafts breaking and falling off with the scab. Do not worry; this is not the root of the hair, but just the shaft part that stays outside. The root remains safely inside.

2. I’ve reached the 10th day but I still have scabs, what should I do? If there is still heavy scabbing on the 10th day, you may need to increase the intensity of the massage you apply during washing. Wash with a bit more pressure using the circular motions of your fingertips without using your nails. If necessary, send a photo to our clinic to get approval from our experts.

3. When can I wear my normal hats? For hats that come into direct contact with the transplant area, like baseball caps or winter beanies, you should wait at least 14 days, preferably one month. For the first 10 days, only use the protective hat provided by our clinic, which has a hard and high top.

4. Can I go outside during the first 10 days? Of course. However, there is no harm in going out as long as you are protected from the sun, dust, and impacts. if you want to enjoy Istanbul, we recommend avoiding the hours when the sun is most direct and taking extra care not to bump your head in crowded places.

5. Do all the transplanted hairs survive? With the right technique and meticulous care, 90–95% of the transplanted hairs survive. However, this rate is directly related to how well you follow the washing and protection rules in the first 10 days.

6. How does smoking affect the result after a hair transplant? Smoking narrows the blood vessels and reduces the amount of oxygen reaching the scalp. This makes it difficult for the roots to be nourished and can lower the survival rate. If possible, you should stay away from smoking one week before and one week after the operation.


Conclusion: Patience, Care, and a New Look

The first 10 days after a hair transplant is truly a journey of patience. The sacrifices you make in this short time are the guarantee of natural and thick hair that you will carry for a lifetime. As the Forever Clinica family, we are here to make this process as comfortable and safe as possible for you in the center of Istanbul. Watching your reflection in the mirror grow more beautiful every day is our greatest source of happiness.

Remember; your new hair will grow not just on your scalp, but in your self-confidence as well. When you pass this process with professional support and by following the rules, you will say to yourself a year from now, “I’m so glad I took this step.”


ℹ️ Results may vary from person to person for every surgical or interventional procedure. It is recommended that you obtain detailed information from your physician before the procedure.

Rhinoplasty Recovery Process: When Are the Packings Removed?

A new face, a new beginning, and a journey of patience. You’ve made the decision to change that one detail that catches your eye every time you look in the mirror. Perhaps you struggled with breathing, or maybe you just weren’t at peace with the shape of your nose. The decision-making process was tough, you chose your surgeon, and the big day has come and gone. Now, you find yourself in the most curious phase: the recovery.

Many of our patients at Forever Clinica reach out to us with rightful concerns: “Will I feel pain?”, “When will the bruising fade?”, or “When can I realistically go back to the office?” Rhinoplasty is not just an operation on bone and cartilage; it is a delicate art of healing. To see the healthiest and most aesthetic results, you must believe in the power of time. Let’s walk through this journey step-by-step, guided by professional expertise, from the very first day.


Rhinoplasty Recovery Process

The First 24 Hours: Waking Up and Initial Contact

The operation is over, and you are back in your room. There is a hard cast (or a thermoplastic splint) on your nose and a small piece of gauze at the tip. The first 24 hours are the stage where your body clears the anesthesia and begins to recover from the surgical shock.

What does this phase feel like? While many people expect severe pain, thanks to modern techniques and advanced anesthesia, rhinoplasty is no longer defined as a “painful” operation. What is felt more is a sensation of nasal congestion—much like having a bad cold—and a feeling of fullness in the face.

Expert Advice: During these initial hours, keeping your head above heart level (sleeping with two pillows) is the best thing you can do to prevent bruising and swelling. Applying cold compresses around your eyes will soothe your skin and accelerate the healing process.


The Big Question: When Are Nasal Tampons Removed?

In the past, the mere mention of “nasal tampons” would scare people due to the legendary stories of meters-long gauze being pulled out. Fortunately, those days are over. At Forever Clinica in Istanbul, Turkey, we generally use silicone, breathable channeled splints. These splints support the internal structure of the nose while allowing you a small chance to breathe through the holes in their center.

Typically, these tampons are removed between Day 3 and Day 7. For many patients, the moment of removal feels like “saying hello to the world again.” That first deep breath provides a relief that makes you forget all the fatigue of the operation. Removing the splints takes only a few seconds and is not a painful procedure; it usually just creates a slight tickle.


Open vs. Closed Rhinoplasty: Does the Technique Affect Recovery Speed?

A frequently asked question is how the surgical technique impacts the healing timeline. Each method has its own unique process:

  • Open Rhinoplasty: A small incision is made in the “columella” (the tissue between the nostrils). This gives the surgeon a wider field of vision. Swelling at the tip of the nose may last a bit longer than with the closed technique. However, this tiny incision scar fades completely over time.

  • Closed Rhinoplasty: All incisions are made inside the nostrils. There are no visible scars on the outside. Since the skin tissue is disturbed less, it can be said that bruising and swelling may fade slightly faster.

However, remember that the choice of technique is determined by your nasal structure and your surgeon’s preference. Healing speed is 80% related to your skin type and your body’s natural recovery capacity.


Bruising and Swelling: Part of the Natural Process

The 2nd and 3rd days after surgery are usually the peak of edema (swelling). When you look in the mirror, you may see color changes around your eyes. Don’t let this scare you! Your body is working overtime to repair the tissue in that area.

  • Day 7: Bruising begins to turn yellow and swelling subsides rapidly. The cast or splint is usually removed during this period. When you see your nose for the first time, you might find it very swollen; this is normal. You are just beginning the “journey” toward your nose’s true shape.

  • Day 14: Usually, by the time you return to social life, bruising has diminished enough to be covered with light makeup, and in many patients, it has disappeared completely.


Return to Work Schedule: When Can We Resume Normal Life?

Life goes on, and you want to return to your routine as soon as possible. But when is the right time?

  1. Desk Jobs: If you work at a computer, you can return to work 7 to 10 days after surgery. Once your splint is removed, there is no physical barrier to working.

  2. Physically Demanding Jobs: If your job involves heavy lifting or constant bending, we recommend waiting at least 3 weeks. Movements that increase your blood pressure can cause nosebleeds or increase edema.

  3. Sports: You can start light walking in the 2nd week. However, for weight lifting, swimming, or contact sports (like basketball or football), you should be patient for at least 6 to 8 weeks. It takes time for the bone structure of your nose to fuse completely.


Transformation in the Heart of Istanbul: Why Turkey?

Every year, thousands of guests from all over the world head to Istanbul, Turkey, for rhinoplasty. Why? Turkey has become a global brand not only with its state-of-the-art hospitals but also with the aesthetic perspective of its specialized surgeons.

At Forever Clinica, we offer you more than just a medical procedure; we offer a comfort zone in the fascinating atmosphere of Istanbul. While you spend your recovery period against the unique view of the Bosphorus, you are essentially experiencing a vacation and a renewal process at the same time. Surgical experience in Istanbul has deepened so much due to the diversity of cases that it has become the first city that comes to mind when “Rhinoplasty” is mentioned globally.


The Psychological Stages of Healing

It is important to discuss the emotional side of recovery. For the first few days, you might feel a bit “blue” or impatient. This is often called the “post-op dip.” When the cast comes off at Day 7, your nose will look “piggy” or very wide because of the swelling.

I always tell my patients: Do not judge your nose in the first month. Healing isn’t linear. One day one side might be more swollen than the other. This is part of the process. By the 3rd month, you will start to love what you see. By the 6th month, you will feel like it was the best decision of your life.


Frequently Asked Questions (FAQ)

1. What happens if I sneeze after surgery? Keep your mouth open when you sneeze. This reduces the pressure inside the nose and protects your internal sutures.

2. When can I wear glasses? Glasses put pressure on the bridge of the nose. Therefore, you should avoid heavy glasses for at least 3 months (preferably 6 months) and opt for contact lenses during this period.

3. How long does it take for my nose to take its final shape? The major change is seen in the first month. However, it takes between 6 months and a year for the nose to “settle” and for all edema to be cleared. Patience is the greatest medicine in rhinoplasty.

4. When can I fly back home? Our international patients can usually fly safely 7 to 8 days after surgery, once their splints are removed.

5. When can I clean my nose? You can start gentle cleaning from the 2nd day using the saline sprays and ointments provided by your doctor. You should avoid blowing your nose for the first month.


Final Thoughts

The rhinoplasty recovery process is a marathon that ends with a massive boost in self-confidence. The challenges of the first few days are replaced by happiness when you see the best version of yourself in the mirror. As the Forever Clinica family, we are here to make this process as easy and comfortable as possible for you in the center of Istanbul.

We know that your nose is not just a respiratory path but the character of your face. Therefore, we stand by you at every moment of your recovery, bringing you to the healthy and aesthetic appearance you dreamed of.

ℹ️ Results may vary from person to person for every surgical or interventional procedure. It is recommended that you obtain detailed information from your physician before the procedure.

What is Skin Sagging Surgery? Skin Sagging Operation

The journey to weight loss is often described as a marathon—a grueling, emotional, and physical test of will. You’ve put in the hours at the gym, overhauled your nutrition, or perhaps undergone a life-changing bariatric surgery. You’ve reached your goal weight, and for the first time in years, you feel healthy. But then, a new challenge appears: excess, sagging skin. It can be heartbreaking to work so hard only to find that your new body is hidden under a “suit” of loose skin that won’t snap back. At Forever Clinica, based in the beautiful heart of Istanbul, Turkey, we see this every day. It’s important to understand that skin sagging isn’t a failure on your part—it’s a biological reality. In this comprehensive guide, we will explore the “why,” the “how,” and the “what next” of skin sagging surgery (Body Contouring).


What Exactly is Skin Sagging Surgery?

In medical terms, we refer to this as Post-Bariatric Surgery or Body Contouring. It is a series of surgical procedures designed to remove the excess skin and residual fat that remains after significant weight loss, pregnancy, or the natural aging process.

Many of our patients ask, “Can’t I just tone this up with more exercise?” We always strive for honesty: while muscle building is great for your health, it cannot “shrink” skin that has lost its elasticity. Think of your skin like a balloon. If you blow a balloon up to its maximum capacity and leave it that way for a long time, when you let the air out, the rubber remains stretched and wrinkled. The elastic fibers (collagen and elastin) have simply reached their limit. Surgery is the only definitive way to remove that excess and reveal the toned body underneath.


Skin Sagging Operation

Why Does Skin Sag in the First Place?

Understanding the cause helps in choosing the right treatment. Our skin is a living organ, but it has its limits.

  • Massive Weight Loss: Especially after gastric sleeve or bypass surgeries, the fat disappears faster than the skin can retract.

  • Duration of Overweight: The longer the skin has been stretched, the less likely it is to bounce back.

  • Age: As we get older, our body produces less collagen, which is the “glue” that keeps skin firm.

  • Genetics: Some people are simply blessed with more “elastic” skin than others.

  • Sun Exposure and Smoking: Both of these factors damage the skin’s structural integrity, making sagging worse.


The Different Types of Body Contouring Procedures

At Forever Clinica, we don’t believe in a “one size fits all” approach. A body transformation is a custom architectural project. Depending on your needs, we may recommend one or a combination of the following:

1. Tummy Tuck (Abdominoplasty)

This is the most sought-after procedure. We remove the “apron” of skin hanging from the lower abdomen and, crucially, tighten the abdominal muscles that may have separated (diastasis recti). This results in a flat, firm midsection.

2. Arm Lift (Brachioplasty)

If you struggle with what people often call “bat wings,” an arm lift is the solution. We remove the loose skin from the underarm area, extending from the armpit to the elbow, giving your arms a sleek, contoured look.

3. Thigh Lift (Thighplasty)

Loose skin on the inner thighs can cause not just aesthetic unhappiness but also physical discomfort and chafing. A thigh lift reshapes the legs by removing excess skin and fat, resulting in smoother skin and better-proportioned lower body contours.

4. Breast Lift (Mastopexy)

Weight loss often leaves the breasts looking “deflated.” A lift repositions the nipple and removes excess skin to restore a youthful, perkier shape. Sometimes, we combine this with implants to restore lost volume.

5. Lower Body Lift (Belt Lipectomy)

For those with 360-degree sagging (abdomen, hips, and buttocks), a lower body lift is the ultimate transformation. It acts like a “belt,” lifting the entire lower half of the body in one comprehensive surgery.


Why Choose Istanbul, Turkey for Your Transformation?

When it comes to complex surgeries like body contouring, experience is everything. Istanbul, Turkey has become the global capital for aesthetic surgery for several reasons:

Expertise Through High Volume Turkish surgeons, especially at Forever Clinica, handle a much higher volume of cases than most surgeons in Europe or the US. This high frequency translates into refined skills and an “artistic eye” for body proportions.

World-Class Facilities Our hospitals are JCI-accredited, meaning they meet the highest international standards for safety and technology. When you come to Istanbul, you aren’t sacrificing quality for price—you are often getting better care than you would at home.

The “Health Tourism” Experience At Forever Clinica, we turn your surgery into a journey. We handle your VIP transfers, luxury hotel accommodation, and 24/7 nursing support. You get to recover in a city where East meets West, surrounded by history and beauty, which can be incredibly therapeutic for the soul.


The Surgical Process: Step-by-Step

1. The Virtual and Physical Consultation Before you even pack your bags for Istanbul, we conduct a detailed consultation. We discuss your medical history, your goals, and which procedures can be safely combined. Safety is our absolute priority.

2. The Day of Surgery Body contouring is performed under general anesthesia. Depending on the complexity, it can last anywhere from 3 to 7 hours. Our surgeons use advanced techniques to minimize blood loss and ensure the neatest possible incisions.

3. Strategic Scar Placement One of the main concerns is scarring. Our surgeons are masters at “hiding” scars. Most incisions are placed where they can be covered by underwear or swimsuits. Over time, these scars fade from red to a faint silver line.


The Recovery: What to Really Expect

We won’t sugarcoat it: body contouring is major surgery. Your body needs time and grace to heal.

  • First 48 Hours: You will likely stay in the hospital for observation. You’ll feel tight and tired, but pain is well-managed with medication.

  • The First 2 Weeks: You will wear a compression garment (a corset). This is your best friend—it reduces swelling and helps the skin “stick” to the new contours.

  • The First Month: Most of the swelling subsides. You can usually return to a desk job and light walking.

  • 6 Months to a Year: This is when the “wow” factor truly kicks in. The swelling is completely gone, the scars have matured, and your new body is fully revealed.


Common Myths About Skin Sagging Surgery

  • “I can just get liposuction instead.” Liposuction removes fat, but it does not remove skin. If you have sagging skin and you do liposuction, the sagging will actually look worse because the “stuffing” inside the skin is gone. You need the skin to be surgically removed.

  • “The weight will come back.” The surgery removes the skin and fat cells permanently. However, you must maintain a stable lifestyle. Significant weight gain after surgery can stretch the remaining skin again.

  • “It’s only for women.” Actually, male body contouring is one of our fastest-growing areas in Turkey. Men often seek tummy tucks and chest contouring after weight loss to achieve a more masculine, defined physique.


Frequently Asked Questions (FAQ)

1. Is body contouring surgery safe? When performed by board-certified surgeons in an accredited hospital, it is very safe. However, like all surgeries, it carries risks like infection or seroma. We minimize these risks through strict protocols and thorough post-op care.

2. How much does it cost in Istanbul, Turkey? While prices are significantly lower than in the UK or USA, they vary based on the number of areas being treated. Contact us for a personalized quote that includes your hotel and transfers.

3. Will I have a lot of scars? Yes, there will be scars, but they are a trade-off for the removal of sagging skin. Most patients find the scars a small price to pay for the ability to wear fitted clothes and feel comfortable in their skin.

4. When can I see the final results? You will see a difference immediately, but the “final” result takes about 6 to 12 months for the tissues to fully settle and the scars to fade.

5. Can I have children after a tummy tuck? Yes, but it is generally recommended to wait until you are finished having children to ensure the longest-lasting results, as pregnancy will stretch the skin again.


A New Beginning Awaits

Excess skin shouldn’t be the final word on your weight loss story. It is simply a hurdle that we can clear together. At Forever Clinica, we don’t just see a patient; we see a person who has fought hard for their health and deserves to feel beautiful.

Are you ready to shed the weight of the past and step into your new life? Istanbul, Turkey is waiting for you, and so is the best version of yourself.


ℹ️ Results may vary from person to person for every surgical or interventional procedure. It is recommended that you obtain detailed information from your physician before the procedure.